


Research: Optimising Gigabyte of Pepper&Carrot images

Here is a technical post where I explain my choices and process in the move from storing the high-resolution PNG@300ppi-lossless to JPG@300ppi-compressed@95% for optimization and performance.
The problem
Hosting 20GB of Hi-Resolution PNG to propose print quality for all the languages is a lot of work to maintain, for a service rarely used. But delivering this 'pre-build' 300ppi version of the comic is something I want to keep, as I believe Pepper&Carrot is a rare ( if not the only ) webcomic to offer this type of service.
Each pages ( 2481x3503px ) rendered as PNG lossless weight more than 10MB. An episode with all current languages represents around 300 pages. So each time a typo, a correction, or a change is done over a page, it's Gigabyte of data to process and upload again. That's why I'm perfecting day after day a set of computer bash scripts to do it, and task for my computer to work alone at night. Today, with 12 episode and 25 languages, I can still manage... Not exactly ; someday at morning, the uploading jobs started the night before is not finished. This affect my productivity as my Internet connexion is slow for half a day. What my actual situation would be with the double of episodes and translations files? Certainly a lot of maintenance, but it also can certainly happen sooner as I expect. Pepper&Carrot is growing at light-speed, and my days are still made of the same 24h. Too much maintenance is a real problem: I want to keep control and free the most time to produce comics, drawings and artworks. That's why I invest time in perfecting my computer bash scripting skill : only automation and optimization can save me time.
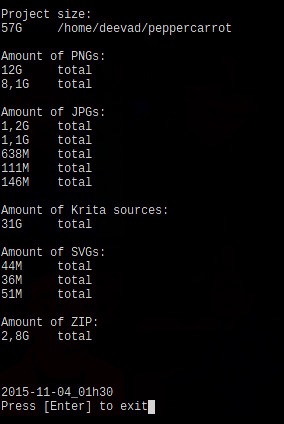
my bash script 'filewalker' doing a report on file weight
Solutions
One solution to solve this problem was to check how to reduce the file weight of the PNG hi-resolution lossless for print. 20GB can certainly be compressed. I made many test with cWebP, Pngcrush, Optipng, Pngquant, Imagemagick, Graphicmagick, Gmic, GDlib to check the best solution to provide high-resolution files ready for print over internet. Also, I wanted to study this change in depth to be sure I'll not do a big switching effort for nothing.
My requirements are simple: I don't mind the file to be a bit altered from the original artwork, the compression can be lossy but it has to be subtle. Subtle to the point I can't see the difference when zooming on both files : PNG lossless on one side, and compressed version on the other side. I used Krita and the Tiling Windows to zoom and compare. I also put the two version each time as layer with the difference blending mode. This blending mode compare the pixel colors, return pure black if nothing is changed, and brighten with an intensity depending the amount of difference between original pixels, and the one in compressed version. I also added on the top of the layer-stack a Filter Layer , with increased Levels. This filter highlight the amount of compressions noise. The compression noise was then something I could appreciate and compare with my eyes :
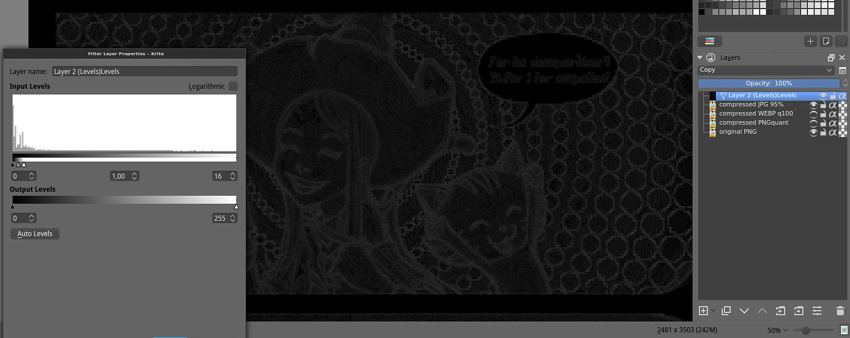
The rig in Krita: comparing in the stack with Difference blending mode. The grey information reveals ( thanks to the Level dynamic filter ) compression artifacts and changes for human eyes; real result of 'difference blending mode' are 90% more subtle.
Thanks to this methodology and tools, it was easier to build my final choice on a real study. Here are my notes while I make the test :
PNG Optimisation: OptiPNG and PNGcrush took around 10min per pages with full usage of all thread and CPU of a icore7 8 core 2,4GHz machine. They changed a 10,5 MB into a 9,2MB page while keeping the same extension and the lossless perfect quality. This type of compression cost too much in time, electricity and the result file-weight is still too high.
WebP: I studied the proposition to do almost lossless files with Webp, using option as -q 100 , and the --preset 'photo'. I was happy to can compare WebP in Krita ( yes, Krita can open them ), but my difference blending mode revealed a really high level of artifacts of compression. With default settings ; cWebp rendered the page to 0.5MB but with a really potato compression aspect. With best settings, ( -q100 and -preset photos ) I was able to obtain a 3MB file. But this file had too many compression artifact. Also, Webp is not supported by all browser or image editor. I would adopt it if the compression artifact was competitive to JPG and if the final weight was also an improvement. But for 'near-to-lossless' this promising technology is not adapted.
JPG: I studied JPG with many libraries and obtained best result in terms of speed, quality and compression with Imagemagick. JPG is compatible with every applications and the king image format of the Internet since more than a decade. First, the 'blur' option is far too destructive. Progressive encoding has advantages to display the hi-resolution pages and almost no impact on filesize, so I kept this option only for hi-resolution. I studied all compression from 92% to 100% , and compared the noise compression with my method described on the picture above. The result : on hi-resolution from 100% to 95% the compression noise is not noticeable. The artwork is not affected at all, nor the colors. The noise don't build any blocks, and don't make a difference with the natural artwork's noise. Render is really fast and file weight go down to 26% size of original. This is my solution.
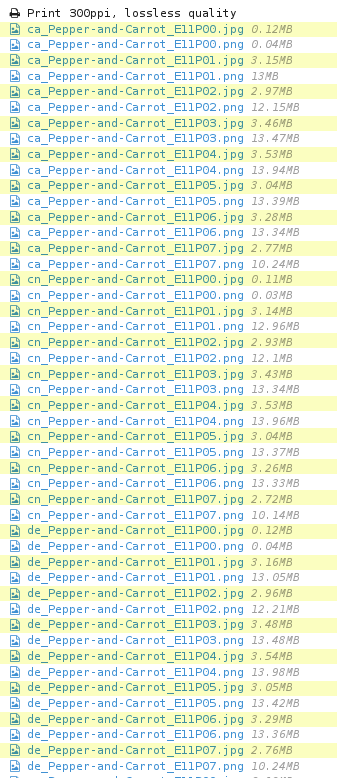 While uploading the files, PNG and JPG were side to side. You can compare the file size on this screenshot.
Here is my table to sumarize the tests :
| filetype | software/options | size | notes |
|---|---|---|---|
| PNG | imagemagick | 10,5MB | lossless ( original ) |
| PNG | pngcrush | 9,2MB | lossless, 10min too long |
| WEBP | cwebp default | 505KB | potatoe looking-like |
| WEBP | cwebp -q100 | 2,9MB | too much artifact |
| WEBP | cwebp -q100 -preset photo | 3MB | too much artifact |
| JPG | imagemagick 99% | 6,4MB | ok |
| JPG | imagemagick 98% | 4,7MB | ok |
| JPG | imagemagick 97% | 3,9MB | ok |
| JPG | imagemagick 96% | 3,4MB | ok |
| JPG | imagemagick 95% | 2,9MB | ok |
| JPG | imagemagick prog + -quality 95% | 2,8MB | ok ( Final choice ) |
| JPG | imagemagick 94% | 2,6MB | too much artifact |
| JPG | imagemagick 93% | 2,4MB | too much artifact |
| JPG | imagemagick 92% | 2.2MB | too much artifact |
| JPG | imagemagick 85% 0.5 blur prog | 939KB | blury potatoes looking-like |
Conclusion
convert -strip -interlace Plane -quality 95% input.png ouput.jpgHere is the final simple command-line I'm using now for managing my high-resolutions 'very-very-near-to-lossless'. I think I can be happy with what I found because I optimised everything to be 74% smaller, a huge impact on bandwith for the HD button, on downloading, and uploading.
This study concerns of course only the case of my pages ( 2481x3503px ) with all requirements I had ( Browser and app compatibility, low file-weight, no-noise but lossy a bit is ok ). I don't write this blog post to feed here a war of format between PNG, WEBP and JPG. I just regret I had to do this study alone, and nowhere on the Internet I could find an article about high resolution pictures with near-to-lossless and recommendations.
I'm making the switch right now of all the database of artworks. It took 2 hours to convert all the hi-res PNG, and more than 40h of upload to update the JPG. I also had to modify the renderfarm and the website to adapt to the new files. Not a little work. But to share 20GB of data with 5GB only , it totally worth it.
For pure lossless quality, I still propose the Krita files with all layers in the Sources category of this website, translations are still SVGs. So, the sources are intact and lossless. Just the final output can be 'very-very-near-to-lossless' to ease every online sharing of files and maintenance.

19 comments
It's so cool that you provide high-res renders!
I wish we had a nice tech solution for the bandwidth/hosting issue. Maybe it won't be long before there's something easy. WebRTC has some fun possibilities (eg WebRTC + bittorrent, or WebRTC + IPFS)
Oh, and one correction: you say (in bold in the conclusion) "26% smaller" but you mean "26% of the size" or "74% smaller".
@Jason Woofenden : Thank you for the feedback !( especially about the percent , I'll fix it )
worth it..than do it manually
Hello,
Just a though.
If I understand well, you export multiple time the same image with different text layers, one export for each translation.
Storing one blank export + one extra layer with just the text per language would save you a lot of disk space (and bandwidth...), since text layers are nearly empty and png would compress them efficiently.
Then I imagine you want the users to be able to directly download the blended image, instead of two separate layers. In this case, it should be possible to either :
* do it server side and propose a link to the merged images, produced on demand (and cached) by a cgi script (image magick ?), maybe php could do it also...
* do it client side, javascript should be able to blend two images on-the-fly.
Maybe the ultimate solution would be to directly do and cache the export from the krita "source code" files on-the-fly... But maybe am I too greedy...
It is sad you have not tested '-lossless' switch for cwebp. webp has mode of strictly lossless compression.
And as Nicolas Carrier said above your case look like a good job for server-side handling. Probably you can directly move your setup from your local machine to server and perform the same image preparing operations overnight.
Thank you David for all these explanations! I was a bit baffled this morning when I couldn't see any PNG file. It's all very clear now.
I had no idea you could achieve excellent results with imagemagick and JPG. That's great news for your workflow.
So I suppose people who'd like to actually print P&C would start from the Krita files, to get high-res PNG. I think this solution is quite all right.
@Nicolas Carrier : That's an interesting design, I'll study it ; server side GD would be able do composition of translation layer + sources graphics.
@Self-Perfection : Ha, true. I didn't ; this option wasn't written in the doc I read about it. I just tested on my reference file: 6,4MB output. Not bad for lossless! Still, Webp suffer too much of a slow adoption of other browsers. I wonder why.
@libre fan : :-) The high resolution JPG are so 'near-to-lossless' quality that you can use them to print Pepper&Carrot. Scribus, LibreOfficeDraw or any other app to compile a book should work with it. For going high precision and convert to CMYK , yes ; Krita source files + export aside the translation layers can allow more control.
On the subject of uploading, are you able to use rsync? If the content of the files isn't changing that much it might save you some bandwidth.
@Julian Calaby : I'm using Lftp and it does the selective upload/remove/download as Rsync would do, but for FTP transfert ( I'm constrain to FTP connexion only with my host at OVH ). I love Rsync, I use it weekly here since years for backup mainly. :)
Ah, that sucks.
(For reference, rsync's algorithm is a lot more complex than that: It only copies the parts of a file that have changed, so if you've got a huge text file and only change one line, it'll only upload the chunk of that file the changes are in. Theoretically this would work for PNGs as well.)
@Julian Calaby : Oh , I see. Too bad. I didn't knew this type of diff on image was existing. Good to know.
The service from https://www.imgix.com/ might actually be perfect for that setting. You can host your base images (without text) at their site for relatively cheap money (3$ per thousand) and have all requests go to their service. Their API allows for quite a bit of image transformation before delivery, so you could either have the text rendered in on the fly by them or blend the base image with a (mostly transparent) text image on the fly.
It will cost money but also save a lot of trouble. The service not being used a lot makes it actually cheaper. Besides the storage for the base images, they only charge by traffic.
Not sure if it suits you, but have you looked at mozjpeg (https://github.com/mozilla/mozjpeg)? It seems to be the most optimised jpeg compressor out there.
@Spyros : Oh I started to get a look at it long time ago, but then I forgot to test it. I'll do ; thx for the reminder.
@tashbarg : Good to know about this external service. I'll have a look.
It can vary depending on the image content, but I usually can compress/save my JPEG images at 85%, sometimes 87%, with no visible loss of quality compared to the PNG. You might be able to detect a difference if testing in Krita blending modes, but I can't really see the difference with my eyes. And a JPEG file saved at 85% can be surprisingly much smaller than a JPEG saved at 90%.
One day, there will be wide support for a format that's better than JPEG. But for now, in my work, JPEG at +/- 85% quality is good enough for the web. I let people download the lossless PNG if they want to print it.
@Andrew Toskin : Here I saw the difference in my test; and the best option for high quality low resolution is to me 92% , also at this compression the JPG don't do chroma optimisation and I keep the same color intensity. My thumbnails generated by GD on website are probably more lossy ; around 87% .
David,
i'm curious about the WebP artifacts you noticed. Could you send me an example, along with the exact cwebp command-line you used) please? (-> pascal.massimino@gmail.com)
In particular: is it because of the YUV420 chroma downsampling in webp? (and: are you using YUV444 with jpeg, btw?)
thanks!
skal
@skal : Hey, I used Cwebp with -acording to the doc on Google- only the quality flag; and the presets flag photo. I tested over a PNG lossless page @300dpi ( around 2,4K pixels on 3,2K pixels ) , so a big PNG with quality 100 and preset photo. I composited as I tell in the article the compressed Webp over the lossless with a difference blending mode to see the pixels changed and the compression artifact, or color shift. ( you can contrast the difference map to better see the result ) That's how you get the artifact. Webp with this setting had way to much changes compare to JPG with high quality, and the weight was worst.
good article and amazing info
Post a reply
The comments on this article are archived and unfortunately not yet connected to a dedicated post on Mastodon. Feel free to continue the discussion on the social media of your choice. Link to this post:You can also quote my account so I'll get a notification.
(eg. @davidrevoy@framapiaf.org on my Mastodon profile.)