


Tutorial : Spider Harp

Idea and Sketch
I often draw a lot of sketch, on computer or on paper. Each idea are precious, and combining them are often a great deal to have original content. Firstly I wanted to draw a girl with a big dragon head up on her shoulder. In drawing the tiles skin of the dragon head from side, I wanted to dispose them in a particular way. That's why I decide to make them around the point of eyes. The pattern finally obtained was like a spider web : immediately I change my original idea to this new theme, changing the low part of neck of the dragon in a tree, and his eyes on a spider.
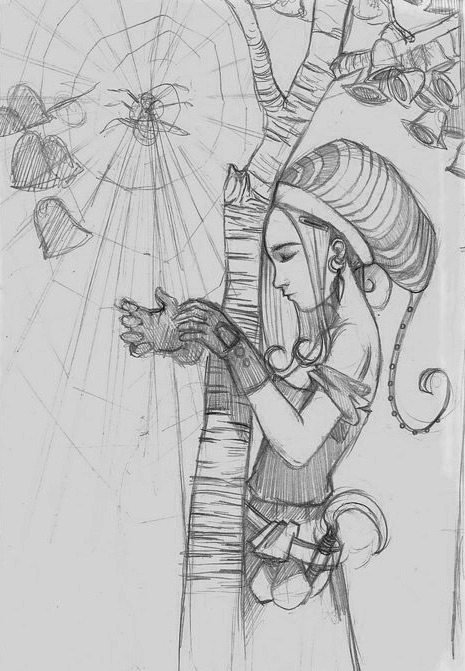 Sketch done on a A5 paper, scanned at 300 dpi
Digitalise it and first grays
After scan it a first time with a low definition ( 150dpi is enough ) I start to blur all with a Gaussian blur before cut the element with selection tool under Photoshop CS2. I define with this way some layers : a background I fill with a circular gradient and a foreground composed of the "character" layer and the "tree" layer. I paint some part with a dark brush to have a start of interesting "material" to paint on after. You have probably a question in mind - Why blur at first ? Cause I want a smooth details, and the scan have a lot of grain and sharp details of pencils stroke. After blurring make the painting more simplest for my way to paint.
 Bluring of the previous sketch, and play with value level
Black and White Painting
My separate layers are ideal to treat separately the background or the foreground. On the foreground I paint the most with Painter 9.5 digital airbrush / and Blenders, I like acrylics too (for the trunk brush stroke , for example). I help myself with a Daz 3D characters (Victoria). I setup the same type of pose, some lights for the head and the hand. It's make a good reference and a low-cost poser girl :) . Sometimes I print this reference to make more place on my screen. I try to paint using all the grays levels: from the white light to the darkest shadows I can. On the background, I create a custom brush stroke to start to have some organics material. You can surely easily guess the shape of this brush on the visual behind. To had some more chaos, I make another layer on my background with a cloud filter (photoshop) and erase it a bit.
 B&W painting with Painter 9.5
I add another layer for foreground plants and vegetations (darker to divide the plan the best). I draw the web on a new layer using the photoshop paths. I block the transparency and I paint with white grays to have shiny spider web.
 Photoshop vector tools for the spider web
I add other details in Painter, focusing them on some part to attract the eyes :items / hand / face / spider. I finally paste on the top of my layers various textures ( concrete / paint textures / wall photos ) I combine with layer effect, opacity and eraser. This add a good paper texture to the picture.
 result
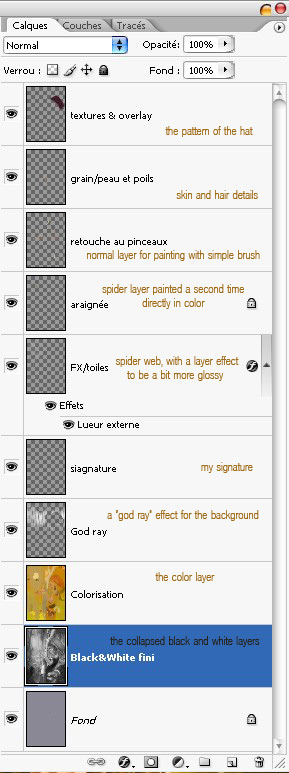
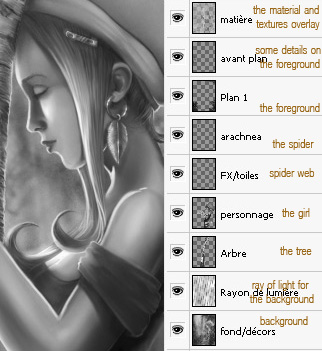 layer details
Colors
On the top of all my layers I had a layer with the "color" mode. I paint with a simple round airbrush some colors. I try different color scheme cause it's easy to change without spending much time. (here you can see a version with blue colors, I studing at this moment. I'm happy to kept this screen somewhere on my disc cause it's a good exemple on how the color play on the mood of the total scene ). My final colors will be as a start of autumn : orange / green / yellow / brown.
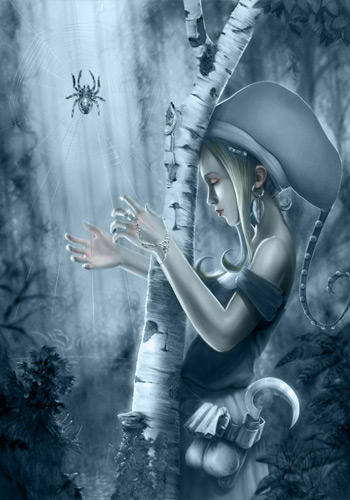 cold ambiant
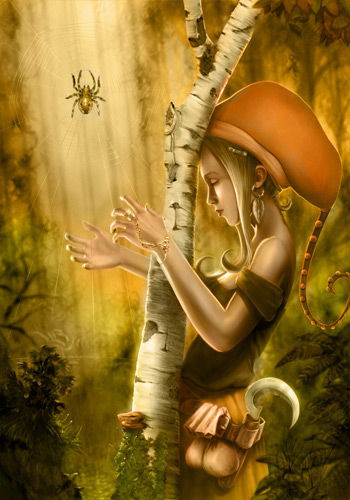 warm ambiant
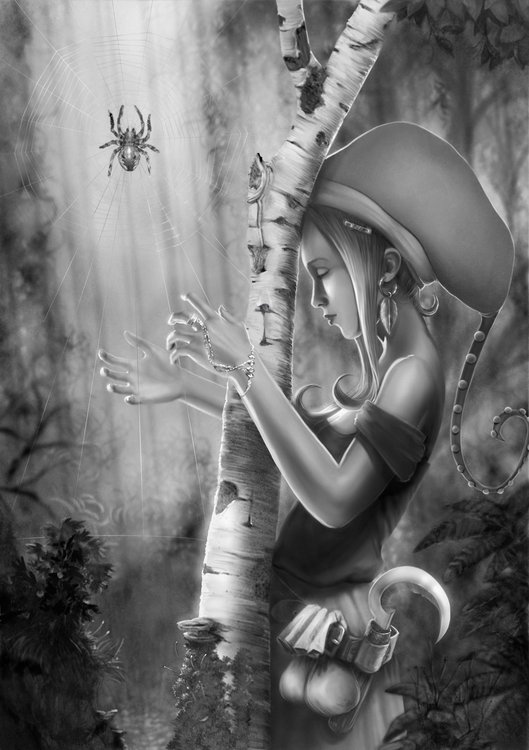
Final step is the time to create a new final layer on the top of all and paint coloring details. As the round drop of water on the spider web, or some delicate red touch on the lips. With the advice of the WIP forum, I change a lot of little mistakes (change the spider pose), and add textures pattern to the hat, and details to all the items of the girl. I had a neutral light from the left side to add volume to the back of girl. I collapse all my gray layer during this step to paint more fluently without "eating" all the memory of my computer , you can see the details of my layers.
 final layer effect
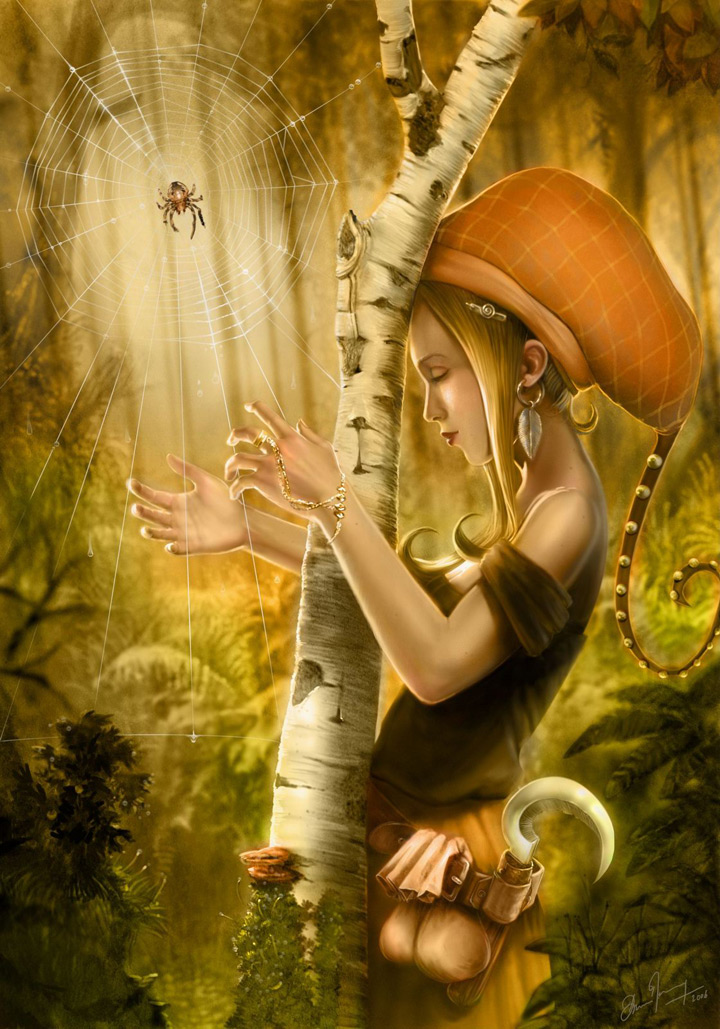 final illustration
Hope you enjoy this tutorial. Have a creative day !
This tutorial was firstly published online by Cgarena here
2025-04: Sources available here and update for a more permissive license (from CC-By-Nc-Nd to CC-By)
