


Software review: Mypaint 1.1 new features
At the very end of 2012, the code of the famous free and open-source digital-
painting program Mypaint 1.1 was
released. If you still using Mypaint 1.0 , you might be interested to see what
happened into this one year of change. For reading an excellent review about
it , please read the very cool and full
article wrote by Alexandre Prokoudine on Libre Graphic World , he also made
a cool video.
Here I will focus on writing a review for Mypaint 1.0 user, to let them know what changed and how they will benefit from it.
On Canvas Notifications
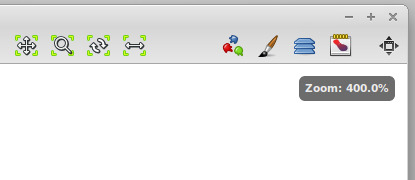
Now Mypaint is a bit more talkative when you press '+' or '-' on the keyboard to zoom with the 'Control+Space' shortcut. It was difficult back to Mypaint 1.0 days to have an idea of the actual zoom level. For the future development , this box system was made to be reusable ; so Mypaint might have better and better visual feedbacks on the next versions.
The notifications are activated by defaults , and concern for the moment only the zoom level.
To set them off or on : Menu > View > Feedbacks
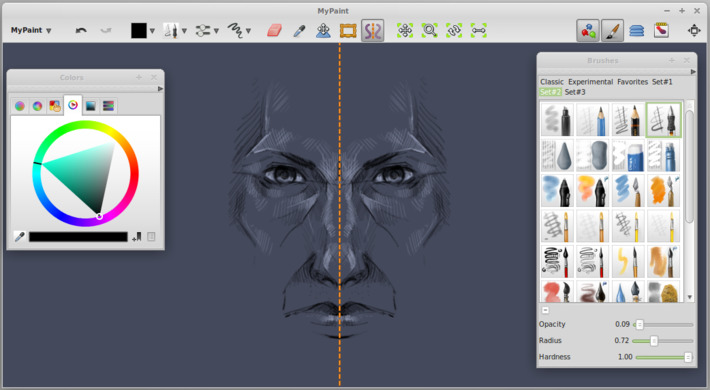
Symmetry mode
An icon on the toolbar allow you to activate the symmetric painting mode. The axis displayed is a bold dotted orange line also part of the new 'on canvas ' feedbacks. To display the axis or hide it : Menu > View > Feedback. The feature is very young and the axis is actually centered to the viewport, so take care if you zoom out or pan the canvas.
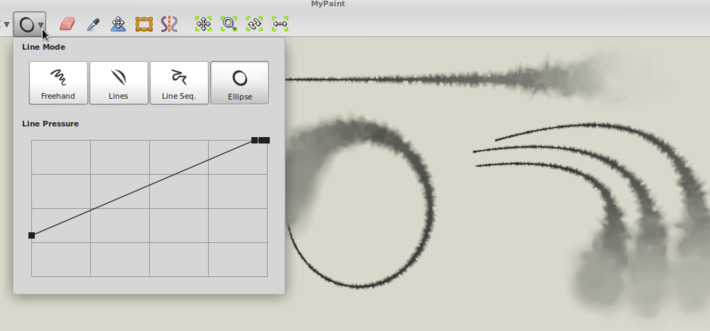
Line Mode
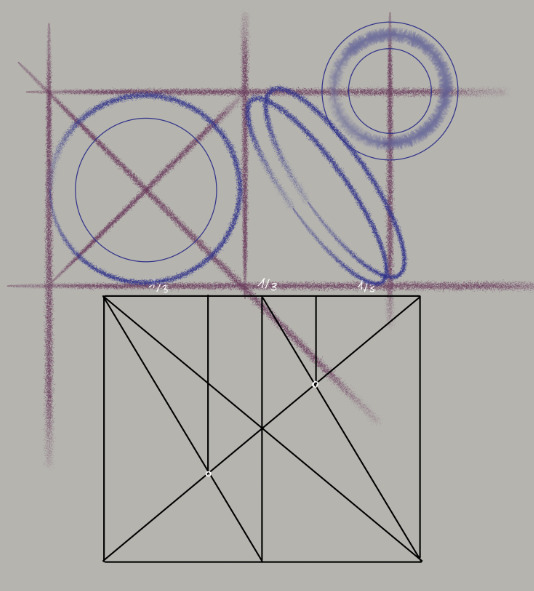
Mypaint 1.1 is now really able to do precise drawing, more technical, such as perspectives, or comics frames. This is not aimed to be a feature as flexible as in a vector programs (ex: Inkscape ) , but its now very capable to get the work done and having very cool results for your perspectives drawing, concept art of props , etc ... On the toolbar an icon will invite you to switch between various tracing mode , there is 4 : Freehand , Lines, Line Seq , Ellipse. Under them there is a graph , where you can tweak 4 points. Those 4 points represent a simulation of pressure ; input on left and output on right.
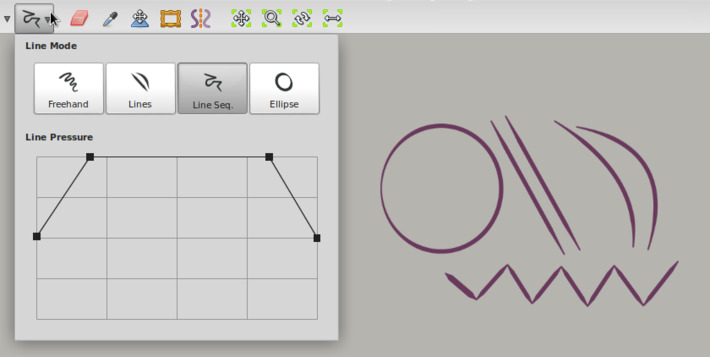
On the screen under you can see how even more complex presets ( here watercolor_expressive from the set#2 ) are traced real time while you deform them. Also, you can see how the 'Line Pressure' parameters works when the input in low, and output is high.
Each 'Line Mode' have it's own little secret of key combinations with Shift for extra features :
Freehand mode + hold Shift
A shortcut to do a straight lines, perfect to draw perspective grid
Freehand mode + press then release shift
A shortcut to do a straight lines , but constrained to every 15°, good if you need to draw square , rectangle ( framing thumbnails, drawing comics frame, or drawing the an horizontal horizon line on a perspective drawing. )
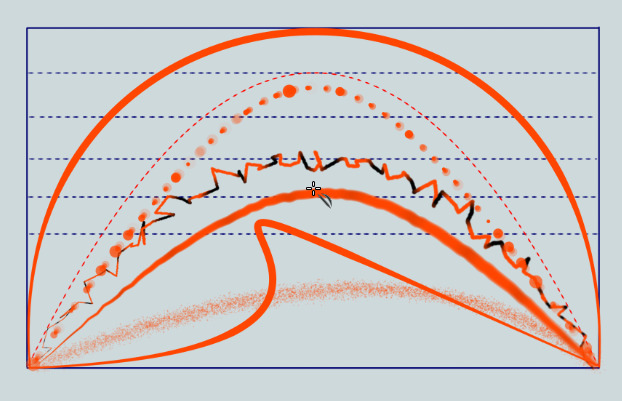
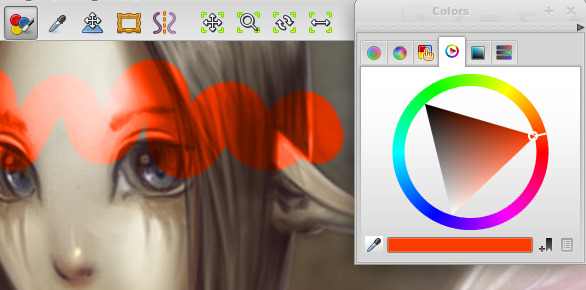
Lines Mode and Lines Sequences : Create a lines , then drag and drop with Shift
A shortcut to bend the lines interactively on the canvas as you can see on picture with red curve under representing various preset bend.
Lines Mode or Ctrl while drawing A shortcut to do straight lines , but constrained to every 15°
Ellipses
Hold Shift during creation to rotate the ellipse
hold Ctrl during creation to constrain ellipse to be a circle
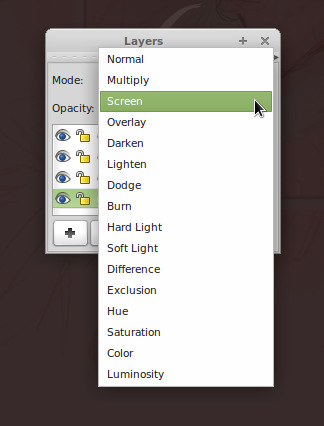
New layer blending modes
One of the revolution in the precedent release were the addition of 4 layer blending modes. Now, the number of them grew to 16 and are compatible with Krita ( for Gimp, still take care of two particularity : they have a 'color' mode incompatible with Mypaint and Krita, and also have a 'overlay' mode broken , a duplicate of the 'soft light' , probably solved in series post 2.8 ).
For Krita user, the Mypaint color blending equivalent mode can be found on Krita under the HSY > Color.
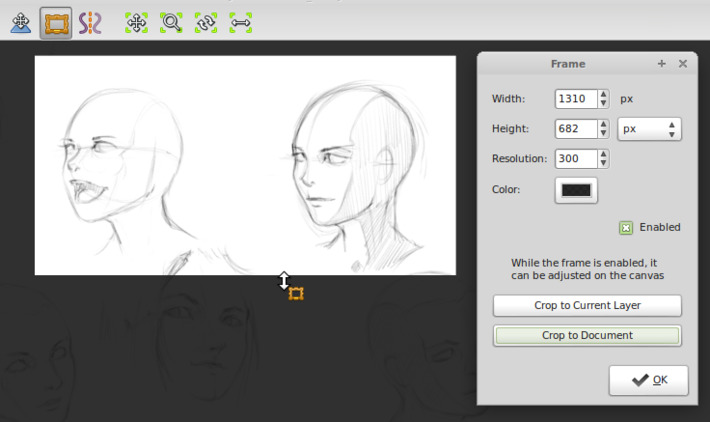
Frame
This feature solved the number one public enemy bug report of all precedent version of Mypaint : the non ability to frame.
Now Mypaint can still benefit of the infinite canvas feature, but you can set a frame on the top and resize. This framing zone will be the only part exported if you save to PNG or JPG , the outside limit of the canvas will be saved if you use the Open Raster format, ORA .
If you open a painting with Mypaint from another application , you may want to turn on the 'Enabled' frame ( I have a shortcut for this ). Your picture dimension will be locked. And Mypaint don't round to 64px everything as in 1.0 anymore.
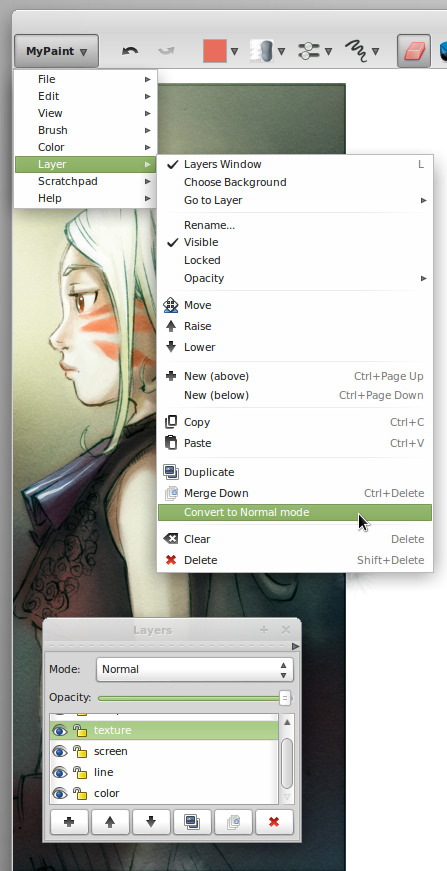
Convert to normal
On the main menu, Layer > Convert to normal mode is another innovation from the Mypaint developers ; it allows to 'bake' the pixels of a layer and render them as a normal blending mode. On the picture under, the textured 'soft light' channel was converted to a 'normal' layer blending mode with keeping the same aspect ( of course, picture loose flexibility , the layer bellow are less editable ).
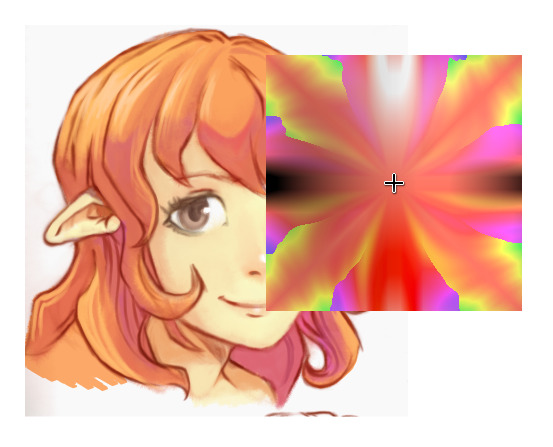
Change color (wash)
On of the first on-canvas color chooser of old Mypaint, who disappeared on version 0.7 . I'm really happy to see it back in 1.1 ; I missed it.
This color selector offer an explosive fractal flower of colors ; with variation of hue, saturation and lightness. It's intuitive and remind me the traditional palette.
attribute it a shortcut by going over the item, and pressing a key :
Mypaint Menu > Color > Change color ( wash )
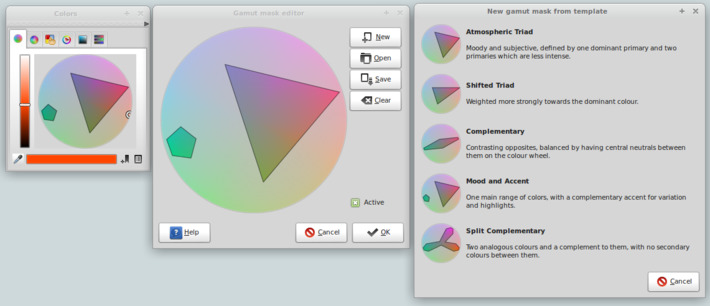
Gamut mask
Masking the gamut is popular on traditional painting : and also happen frequently when your tubes of colors are empty , or when you limit yourself to use only some tubes of colors. Restricting the range of color , or masking the gamut , was also really well explained by a famous traditional painter James Gurney . I personnaly really learned a lot with his book : Color and Light. Mypaint 1.1 is the first digital painting application to support Gamut masking , in a digital fashion. Here under is a study with a split complimentary mask. I still need to train with it. I see a lot of potential in this feature especially to have interesting color palette and original renderings.
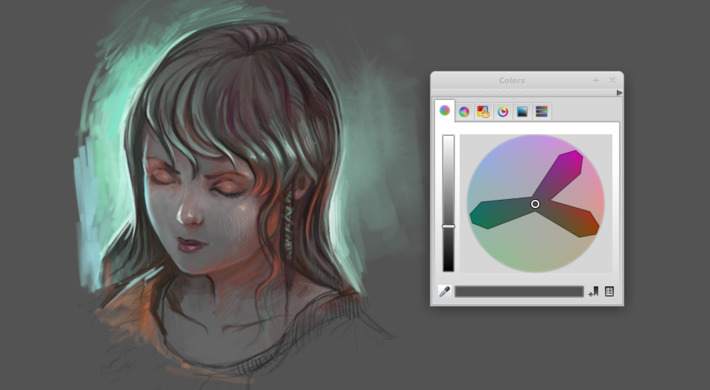
You can set a lot of various mask , at 1 click away ( bottom right icon of the color palette ) , and move the shapes, etc... The user interface is really easy to learn.
New color selector
A new color selector replace the old one, and propose now :
- a HCY Hue and Chroma : All the color on the circle have the same lightness intensity ( Y ) nearest of human color perception.
- a HSV Hue and saturation : Linear and dependent of the RGB value and screen device, Blender user will be familiar with this one.
- a palette , compatible with Gimp *.gpl palette files
- a classic color triangle , HSV too. Thats the one I use the most ( I'm used to have same in Krita / Inkscape / Gimp ) , but I move slowly to the HCY Hue and Chroma
- another HSV under the layout of a square , Photoshop user will be familiar with this one. ( not you can also rotate the H, S, V in it )
- last tab is for rulers
Tips :
- you can at any moment bookmark a color to the palette , icon in also on the bottom right
- if you double click on the square of the actual color on the bottom , another color selector will open , where you can enter values, useful is you have to deal with webdesign/interface elements ( ex : entering a grey #7B7B7B ).

Color brush blending mode
Brush blending modes where each dabs strokes affect the color bellow is a different feature than layer blending mode. Mainly because you can save the effect into a preset, and because the effect can get stronger as they are pilling on the canvas.
Color blending mode ( HSY ) is one of the first.
Multiply blending mode for glazing will surely be on the way to the next releases , and I guess the 'layer>convert to normal' feature is already a first stone to allow painting with Brush blending modes even on a transparent layer.
Preferences
Now the Preferences panel can offer you the possibility to map a important number of action to special key ; as tablet and stylus button , or Shift, Ctrl ( named Primary ) , etc...

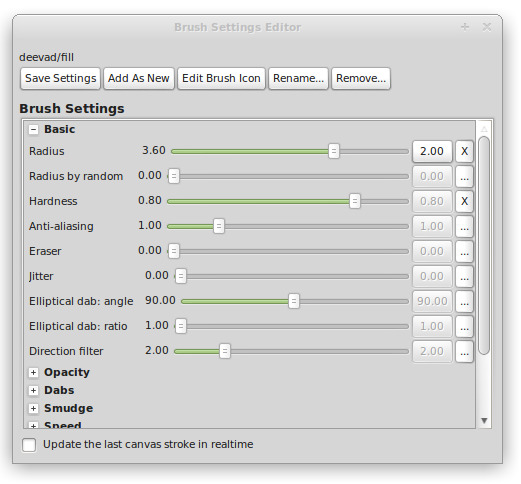
Brush settings
Brush settings is a panel you can call with pressing 'Control+B' or by going in the menu > Brush > Setting Windows.
Nothing really changed on the appearence ( except the top tabs button, with labels now ) , but the Brush preset of 1.1 are in a new format. Old preset are still compatible.
My own kit of preset is the set #2.
Tips : if you modify a brush size , opacity and want the change to be permanent ; open the settings, then press the 'save settings' button.
Installation
Mypaint official download page : http://mypaint.intilinux.com/?page_id=6
Windows version is still not ready. A bug in one of the library make the tablet not working. Tumagonx is still alone on working on Windows portablity. Linux user will be able to compile the source code ( follow the README inside the source code archive ) , and distributions will certainly provide it via system updates in your package management of their next release. Ubuntu 's based Linux can use the easy PPA of Andrew Chadwick : http://www.davidrevoy.com/?article85/mypaint-got-a-ppa
Mypaint team
A lot of effort, hours were done on this release :
- Martin Renold ( aka maxy ), creator and leader of the project.
- Andrew Chadwick ( aka achadwick ) who made Gamut mask, frame feature, color selector, notifications and many more.
- Jon Nordby (aka jonnor ) who worked a lot on cleaning the brush engine, library , performances.
- Richard Jones ( aka optigon ) who made all the Line modes.
- and of course, all other contributors , translators, and testers.
If you now cross this nicknames on IRC freenode channel #mypaint or on the forum , thanks them for the awesome work they do around this open-source software. They already started the road to 1.2.
License of the article :
Images and text on this article are licensed under a CC-By : Any usage of it ( copy paste / translating / commercial / publishing / derivations, etc ... ) are allowed if providing back the credit "by David Revoy" . Full license : http://creativecommons.org/licenses/by/3.0/
( PS : Well... that was long to write, now I blemish imagining doing the same thing for the release of Krita 2.6 ... oh my.... it will be long )
