


Linux Mint 11 for digital painting
Warning :the method presented in this article are too old to be applied now. Use this information at your own risk. But ! if you want to configure a Wacom from command line , you can find here precious informations, that's why I don't archive this guide yet.

Linux Mint 11 Katya download page :
http://www.linuxmint.com/release.php?id=16
Here are my notes, to transform a Linux Mint 11 Katya fresh install into my ideal production-ready machine on my studio, with all apps I need. I tried to write it with details for almost Linux beginner. Also straight forward, most actions are condensed to be 1 lines copy/pasting.
I 'll keep this config for a long time. Mostly new solution can't fill half of my needs. A reason more to publish my note and share my treasure.
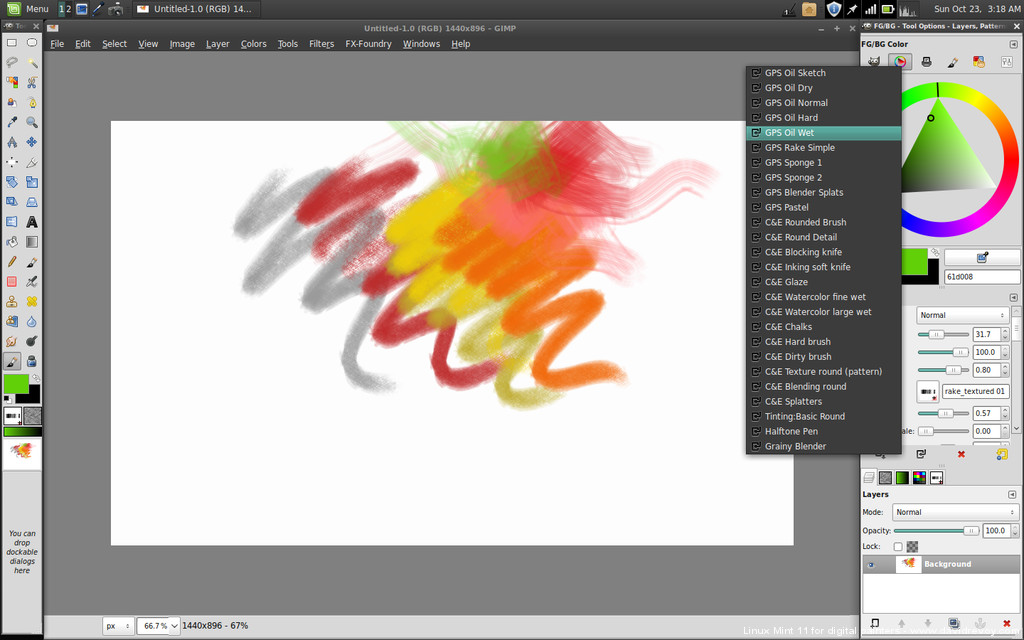
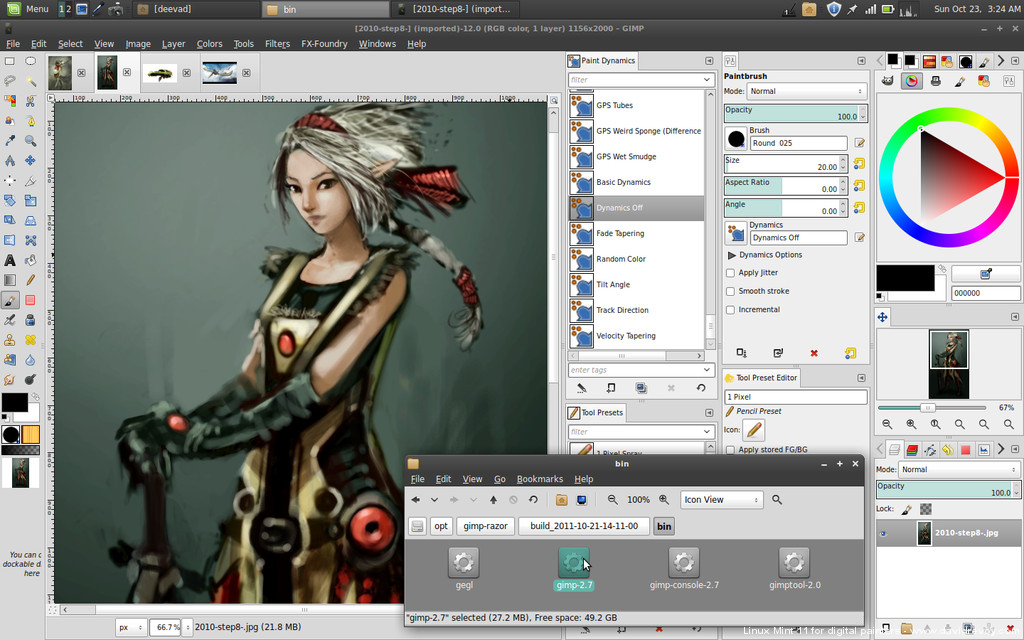
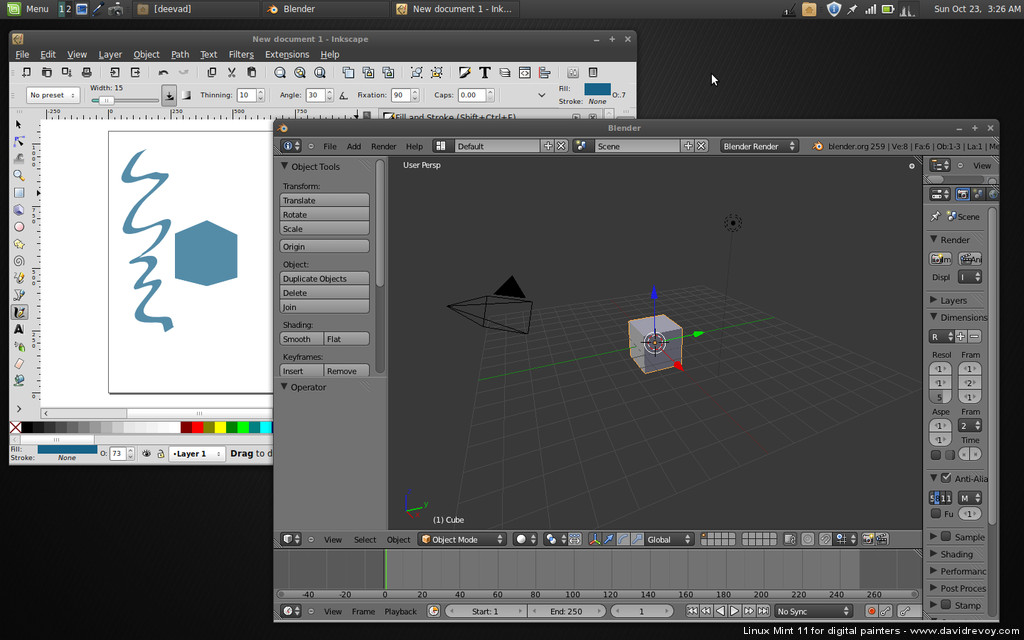
screenshot gallery :


Note : all was tested and written for Linux Mint 11 main Gnome edition. All of this informations are not meant to be compatible with other distribution or other version, please don't comment if it's not working in another release, and do it at your own risk.
System modifications :

Note : if you have a Gfx card, Install proprietary driver , a pop-up propose the installation of restrited driver at startup of a fresh install , follow instruction , then reboot.
Note 2 : To use the code here , open a terminal ( Menu > terminal ) then copy paste this each line by each line ( with Ctrl + C to copy the selected line but Ctrl+Maj+V to paste in a terminal ; or the auto method : select the line with 3 mouse click and paste directly with one mouse wheel click -simplier- ) confirm when needed with typing 'y' then enter, or type your password when asked.
Switch to gnome classic
Log-out , at login screen, click on your name, then in the menu who appear under choose Gnome ( No effects ) ( menu on the bottom of the screen ) , then log in with your password.
Correct distribution bugs
Linux Mint 11 comes with all the bugs of Ubuntu 11.04 Natty Narval . Bugs makes Compiz laggy ( effect for windows manager ) , problems for 3D programs and tablet.
Downgrade Compiz
sudo apt-get purge compiz compiz-plugins-extra compiz-plugins-main compizconfig-settings-manager
sudo add-apt-repository ppa:guido-iodice/compiz-0.8.6-natty
sudo apt-get update
• upgrade the whole system , can be a long step :
sudo apt-get upgrade• install the new downgraded compiz, not buggy :
sudo apt-get install compiz compiz-core compiz-fusion-plugins-main compiz-fusion-plugins-extra compiz-fusion-plugins-unsupported compiz-gnome compiz-plugins compizconfig-backend-gconf compizconfig-settings-manager libcompizconfig0 libdecoration0 python-compizconfigDowngrade Xorg
sudo apt-get install xserver-xorg-core=2:1.10.1-1ubuntu1• open Menu > Package Manager ( Synaptic ) , in the quick filter , type 'xserver-xorg-core', click on the package, then go to the menu 'package' and activate 'Lock version'.
Applications available via repository :
• A list with some classic, as Ftp tools , color picker and color management, basic tools to compile , etc 57MB :
sudo apt-get install inkscape agave gcolor2 filezilla argyll gnome-color-manager git-core cheese cmake gitk gparted gthumb make meld nautilus-actionsApplications available via Ppa :

• Kdenlive (last stable) : ( video editing )
sudo add-apt-repository ppa:sunab/kdenlive-release && sudo apt-get update && sudo apt-get install kdenlive• Mypaint Git development version : ( lightweight painting software, digital sketchbook )
sudo add-apt-repository ppa:achadwick/mypaint-testing && sudo apt-get update && sudo apt-get install mypaint• Gimp-painter 2.6.11 : ( Photo manipulation tool forked to can do digital painting, full suit )
Uninstall the default Gimp package ( non-painter ) in Linux Mint default install :
sudo apt-get autoremove --purge gimpthen install it from ppa + some plugin and additionnal plugin package :
sudo apt-add-repository ppa:mizuno-as/ppa && sudo apt-get update && sudo apt-get install gimp gimp-plugin-registry gimp-gmic gimp-resynthesizer then to not make future Gimp update overwrite your Gimp-painter, open Menu > Package Manager ( Synaptic ) , in the quick filter , type 'gimp', click on the package, then go to the menu 'package' and activate 'Lock version'.
• Blender , recent version : 3D software
This ppa gives the 2.59 for the moment ( 24 oct 2011 ) :
sudo apt-add-repository ppa:irie/blender && sudo apt-get update && sudo apt-get install blender2.5or more bleeding edge version ( 2.6 development ) this ppa under :
sudo add-apt-repository ppa:cheleb/blender-svn && sudo apt-get update && sudo apt-get install blenderNote : Thanks Shaun Perryman for this second PPa link on the comment.
• CMYKTools : Cmyk utility conversion
sudo apt-add-repository ppa:amr/blackfiveimaging && sudo apt-get update && sudo apt-get install cmyktoolApplications from internet :

• Gimp Paint Studio 1.5 presets pack ( brush / gradient / etc... ) Note: it will overwrite any existing .gimp2-6 preference in your home, if you already have one :
wget http://gps-gimp-paint-studio.googlecode.com/files/GPS%201_5_final%20release.zip && unzip GPS\ 1_5_final\ release.zip -d ~/.gimp-2.6 && rm GPS\ 1_5_final\ release.zip • Gimp Ora plugin ( to collaborate with Mypaint and Krita via the openraster file format .ora ) _Note: for usage after install , just open or save .ora files as you would do with other type of file in Gimp. _
mkdir ~/.gimp-2.6/plug-ins && wget http://www.davidrevoy.com/data/documents/file-ora.py.tar.gz && tar -xzvf file-ora.py.tar.gz -C ~/.gimp-2.6/plug-ins && rm file-ora.py.tar.gz• DispcalGUI : ( color calibration tool ) Note: select your architecture, download and double-click the file to install : http://hoech.net/dispcalGUI/#download
Krita
☆ Special thank to Bugsbane (a.k.a. Kubuntiac) script source URL : http://forum.kde.org/viewtopic.php?f=139&t=92880 ◕ 4 to 5GB diskspace needed.
• in home I create a folder "source-to-compile" , I will store them all in this place to keep my home folder clean
cd && mkdir source-to-compile• Installing dependencies ( the script normally grab them, but I do this to be sure )
sudo apt-get install cmake git kdelibs5-dev zlib1g-dev libpng12-dev libboost-dev liblcms1-dev libeigen2-dev libexiv2-dev pstoedit libfreetype6-dev libglew1.5-dev libfftw3-dev libglib2.0-dev libopenexr-dev libtiff4-dev libjpeg62-dev xserver-xorg-input-wacom oxygen-icon-theme kdebase-runtime-data kdebase-runtime---[update 18/12/2011] ---
Lcms2 : Krita switched totally to the library liblcms2 - faster, more stable, etc... but not provided by defaullt Linux Mint 11 package.
So, to get it, you will need to compile Lcms2, newer distribution don't need it.
- go here : http://sourceforge.net/projects/lcms/files/ then download the last version of the sources , the *.tar.gz version
- extract it , then paste the content into your ~/source-to-compile/ folder created before
- open the lcms folder with your terminal
./configure
make
make check
sudo make install
done
--- ---
• Installing the script :
cd ~/source-to-compile && wget http://krita.org/builder/calligra-creative_build-script.sh.tar.gz && tar -xzvf calligra-creative_build-script.sh.tar.gz && rm calligra-creative_build-script.sh.tar.gz• launch the script :
./calligra-creative_build-script.sh• Edit path :
gedit ~/.profile• and inside paste this at the end :
export KDEDIRS=$KDEDIRS:$HOME/source-to-compile/calligra/calligra-inst
export PATH=$PATH:$HOME/source-to-compile/calligra/calligra-inst/bin
• then log out your system , and re login. Krita should launch if you click with your file explorer ( nautilus ) on the "/home/<yourusername>/source-to-compile/calligra/calligra-inst/bin/krita" icon.
• To fix KDE apparences, and have a compact theme :
sudo apt-get install systemsettings qt4-qtconfig qtcurveLaunch qtconfig ( Alt+F2 , then type it , then enter ) and in apparence, select Qtcurve , tune the palette and font to your taste launch systemsettings ( Alt+F2 , then type it , then enter ) and go into 'Application Apparence' for advanced config ( color, icon size, icon style , more UI colors ) . Just remember their is overlap of features between qtconfig and systemsettings , but even if qtconfig have less option, it will have last word.
• Launcher creation :
Right click on the main Menu button , edit menu :
Click the Graphic category , and press '+New item' button
Fill the launcher like this :
Name : Krita
Command : /home/<yourusername>/source-to-compile/calligra/calligra-inst/bin/krita
you can choose an icon , here I take a png from one of my set
Press ok , now Krita is in your applications.
• to update :
cd ~/source-to-compile && ./calligra-creative_build-script.shGimp development version
Special thanks : Stéphane Robert Richard ( aka Zanshine )
script source URL :http://blog.zanshine.com/blog/stephane-richard/2011-05-10/cutting-edge-gimp-in-latest-ubuntu/ _
◕ _ 500MB diskspace needed.
_
• preparing directories :
sudo mkdir /opt/gimp-razor
sudo chmod 777 -R /opt/gimp-razor/
• ( this is only if you don't have a 'source-to-compile' folder ) :
cd && mkdir source-to-compile• grabbing the script :
cd ~/source-to-compile && wget http://www.davidrevoy.com/data/documents/gimp-razor-script.tar.gz && tar -xzvf gimp-razor-script.tar.gz && rm gimp-razor-script.tar.gz• launch the script :
./gimp-razor-script• Launcher creation :
Right click on the main Menu button , edit menu :
Click the Graphic category , and press '+New item' button
Fill the launcher like this :
Name : Gimp dev
Command : /opt/gimp-razor/<thebuilddate>/bin/gimp-2.7a
( explore the opt folder to know the name of the <thebuilddate> )
you can choose an icon , here I take a png from one of my set
Press ok , now Gimp last dev is in your applications.
• to update :
cd ~/source-to-compile && ./gimp-razor-scriptNote : at each 'build' ( when you launch the script ) you will be updated. Also a new version ( folder ) will appear under your /opt/gimp folder. Think to clean it a bit sometime of old builds ( right click on /opt/gimp-razor/ , open as administrator , then delete old builds with 'suppr' on the keyboard ... Read the number of build like this : year - month - day - hour - minute - seconde ... ex : 2011-10-21-14-13-55 , for now I edit this article ).
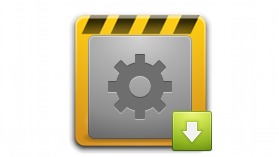
Thumbnails for .ora , .xcf and *.kra :
Method for displaying thumbnail image preview on icons of Hi-res layered files, a must, really productive :
• xcf ( Gimp )
sudo apt-get install xcftools gnome-xcf-thumbnailer • ora and kra : ( Mypaint / Gimp / Krita )
_• _grab sources :
cd ~/source-to-compile && wget http://www.davidrevoy.com/data/documents/thumbnailer-ora-kra.tar.gz && tar -xzvf thumbnailer-ora-kra.tar.gz && rm thumbnailer-ora-kra.tar.gz_• _install :
cd ~/source-to-compile/thumbnailer-ora-kra && sudo ./thumbnailer-ora-kra-installer.shNote : You may need to refresh thumbnail cache to make this take effect, go with your file explorer in your user folder, press Ctrl+H to unhide the folder of custom preferences, and delete the folder .thumbnails ( it will be regenerated )
Wacom tablet
For hardware support have a look here http://www.linuxwacom.sourceforge.net
• In a nut-shell : to configure your Wacom at each start-up, you will have to write a script. This *.sh script will be a series of 'xsetwacom' lines to setup and customise your tablet.
_• _to know your tablet device name :
xsetwacom list_• _here it return the name of my Wacom devices :
Wacom Intuos4 6x9 stylus id: 8 type: STYLUS Wacom Intuos4 6x9 eraser id: 12 type: ERASER Wacom Intuos4 6x9 cursor id: 13 type: CURSOR Wacom Intuos4 6x9 pad id: 14 type: PAD • So, I wrote under a simple script of xsetwacom instructions to the devices :
#! /bin/bash
# Wacom setup at startup
# Intuos4A5
#Buttons
xsetwacom set "Wacom Intuos4 6x9 pad" Button 2 "key f12"
xsetwacom set "Wacom Intuos4 6x9 pad" Button 3 "key x"
xsetwacom set "Wacom Intuos4 6x9 pad" Button 4 "key m"
xsetwacom set "Wacom Intuos4 6x9 pad" Button 5 "key ctrl z"
# round middle dial button
xsetwacom set "Wacom Intuos4 6x9 pad" Button 1 "key e"
xsetwacom set "Wacom Intuos4 6x9 pad" Button 6 "key ctrl"
xsetwacom set "Wacom Intuos4 6x9 pad" Button 7 "key c"
xsetwacom set "Wacom Intuos4 6x9 pad" Button 8 "key w"
xsetwacom set "Wacom Intuos4 6x9 pad" Button 9 "Key shift"
# stylus
xsetwacom set "Wacom Intuos4 6x9 stylus" button 2 "key Control"
xsetwacom set "Wacom Intuos4 6x9 stylus" PressureCurve 40 0 100 80
_• _To autolaunch the script ( save it for exemple as ~/wacom.sh ) at start-up , Use the Mint Menu > Preference > Startup Application and link there your script.
infos about settings :
**• Stylus buttons :**
button 1 = tip ( part to draw ) , button 2 = first button ( next the tip ) , button 3 = second button.
**• PressureCurve parameters :**
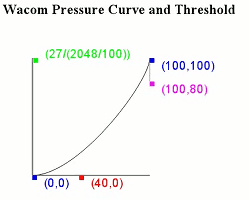 "40 0 100 80" is my preset is for a "hard"
Set your curve with this interactive javascript here : http://linuxwacom.sourceforge.net/misc/bezier.html ( grab the handler with mouse )
"40 0 100 80" is my preset is for a "hard"
Set your curve with this interactive javascript here : http://linuxwacom.sourceforge.net/misc/bezier.html ( grab the handler with mouse )
_• _more documentation about the possibilities of xsetwacom : http://sourceforge.net/apps/mediawiki/linuxwacom/index.php?title=Xsetwacom
Tablets Cintiqs : Calibration & dual screen ( nvidia twinview )
_
Krita running on a Cintiq, dual setup with Linux Mint 11_
_• _Cintiqs behaves like a simple tablet over a screen ( intuos3 or intuos4 depending of the model ) , for both recognitions of hardware it's usually ok but for more information about supported hardware read the official wiki : http://www.linuxwacom.sourceforge.net ).
Update :
_• _an updated Wacom driver is necessary to support dual screens with nvidia twinview , to update the driver do :
sudo add-apt-repository ppa:irie/wacom && sudo apt-get update && sudo apt-get install xserver-xorg-input-wacomCalibrate :
_• _to calibrate your Cintiq, you will need Xinput-calibrator :
sudo apt-get install xinput-calibrator_• _usage :
Note : To calibrate the Cintiq, unconnect other monitors, and do the following in single screen mode :
Note 2 : replace the 'device' with your device name, if you don't know it read the start of this Wacom part again.
xinput_calibrator --device "Wacom Cintiq 21UX stylus"Click the red 'target' with your stylus , be precise , try to adopt at this moment your default position in front the Cintiq . Xinput_calibrator is not able to write down the values , but will return the information in the terminal :
calibration data: 327, 86436, 374, 65171understand the value like this pattern [ minX maxX minY maxY ]
_• _Xsetwacom will be able to set this settings. We will add this xsetwacom rules to our ~/wacom.sh 'start-up script' with the help of Area. Be carrefull, xsetwacom Area change the value order in this pattern : [ minX minY maxX maxY ]
# my permanent Cintiq 21Ux calibration values :
xsetwacom set "Wacom Cintiq 21UX stylus" Area 327 374 86436 65171
xsetwacom set "Wacom Cintiq 21UX eraser" Area 327 374 86436 65171
_• L_aunch your script made with your xsetwacom parameters, and test if the calibration is ok. You can redo it if necessary.
Twinview ( dual screen ) :
Note : following is only for proprietary nvidia driver users ( if you don't have twinview it may be easier , read this on the documentation )_
_• _Reconnect your other monitor ( reboot if necessary ) , and set your desktop with the wanted twinview setup ( Alt+F2 , type 'gksudo nvidia-settings' + enter ). When your dual monitor twinview is setup , add this kind of xsetwacom parameters to 'lock' your stylus to the Cintiq screen only :
# Twinview dual screen setup
xsetwacom set "Wacom Cintiq 21UX stylus" MapToOutput "HEAD-0"
xsetwacom set "Wacom Cintiq 21UX cursor" MapToOutput "HEAD-0"
xsetwacom set "Wacom Cintiq 21UX eraser" MapToOutput "HEAD-0"
xsetwacom set "Wacom Cintiq 21UX pad" MapToOutput "HEAD-0"
Note : "HEAD-0" can be "HEAD-1" etc... depending on your screen disposition, just test the value who does the right job.
Eyecandy and Appearance:
• Fix border style of thumbnails ( frame in nautilus ) : (drop shadow style, instead of glowy white around, for dark theme ) , this will also reboot nautilus
wget http://a.imageshack.us/img135/8666/thumbnailframe.png && sudo cp thumbnailframe.png /usr/share/pixmaps/nautilus/thumbnail_frame.png && killall nautilus && rm thumbnailframe.png• Faenza icons : ( eyecandy icons )
sudo add-apt-repository ppa:tiheum/equinox && sudo apt-get update && sudo apt-get install faenza-icon-themeswitch to faenza icon theme : right-click on desktop , then 'Change desktop background', then 'theme' , 'customise', 'Icons' , select Faenza.
• Wallpaper : http://awesomewallpaper.files.wordpress.com/2011/01/carbon-mint-v5-02-2560x1600.png Save it, right-click on desktop wallpaper , then 'Change desktop background' , then setup it.
• Remove the thin overlay scrollbar depend your taste with them. I don't like it with a tablet , it made me do mistakes most of the time. To remove them :
sudo su
echo "export LIBOVERLAY_SCROLLBAR=0" > /etc/X11/Xsession.d/80overlayscrollbars
You need to logout, then login to see the result.
• Theme : Right-click on desktop wallpaper , then 'Change desktop background', then 'theme' , 'customise' Controls : Shiki-Wise Color : customise 'selected items' with your favorite color. Windows border : Shiki-Colors-Easy-Metacity Icon : Faenza
• Panel on top : Right click on a empty zone of your panel, in the menu select 'properties' Orientation : Top
• Mint menu : Right click on the Mint Menu to setup it ( color / number of apps in favorite / etc )
End note :
If you find a better way to install things , or shorter , please share in the comment. I tested all of this so many time, but I'm not protected against a typo, or a mistake. Help me to improve.
If you want to do a similar guide for your distribution, please do it, more documentation, more freedom for digital painters.
If this made you win times , and make you enjoy your Linux Mint 11 system ; share it !
