


Clean blue sketch traditional line-art to color it digital with in Krita
Intro
This is a tutorial about the "traditional to digital" topic. You'll see all the step I use for drawing, scanning and cleaning my traditional line-art when I use this technique on my webcomic Pepper&Carrot. In the first part of the tutorial, I'll show you my workflow for sketching, and 'inking' with pencil. In the second part, we will scan the lines, and clean them in Krita to keep only the pencil artwork. In the last part, I'll show how to tint the lines, and make them transparent to be ready to receive a full color work later.
1. Warming up
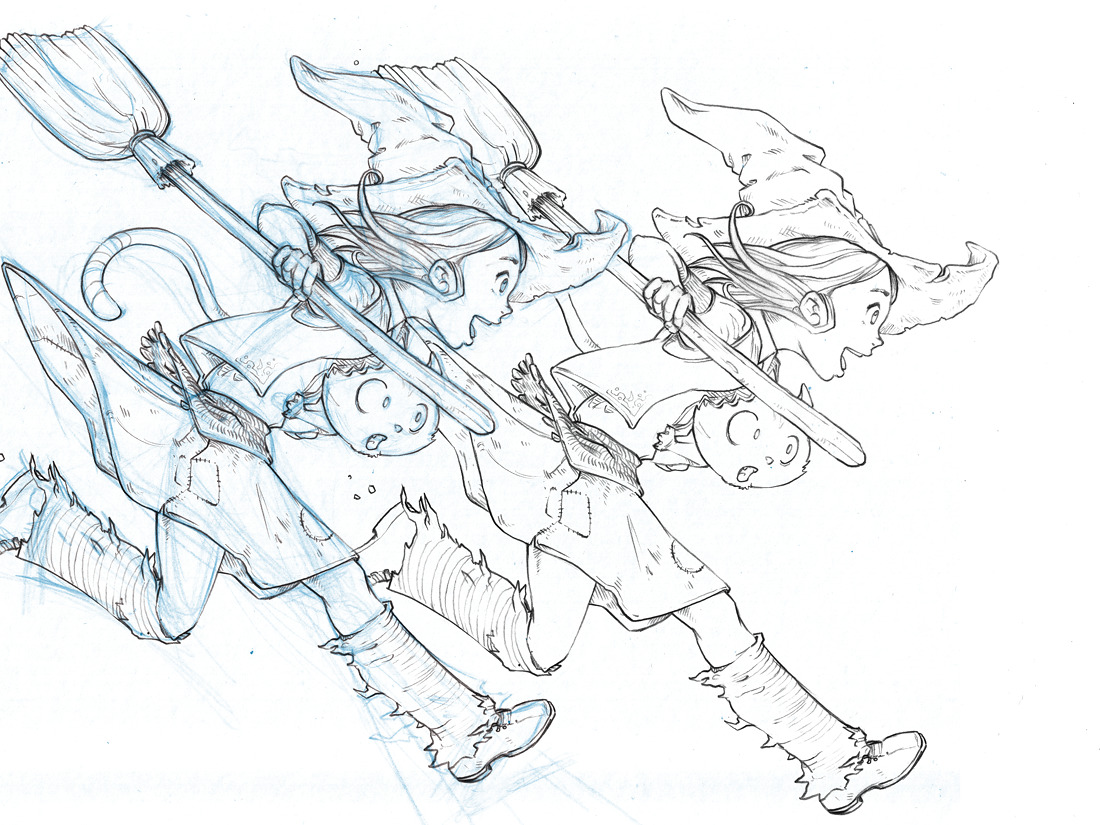
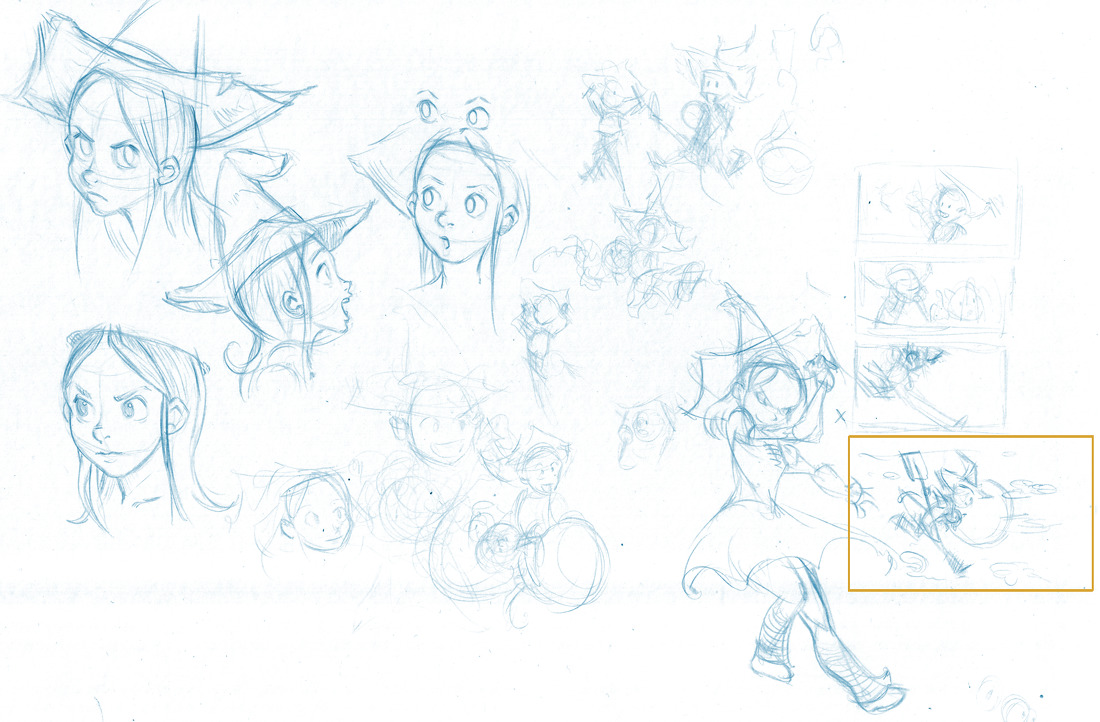
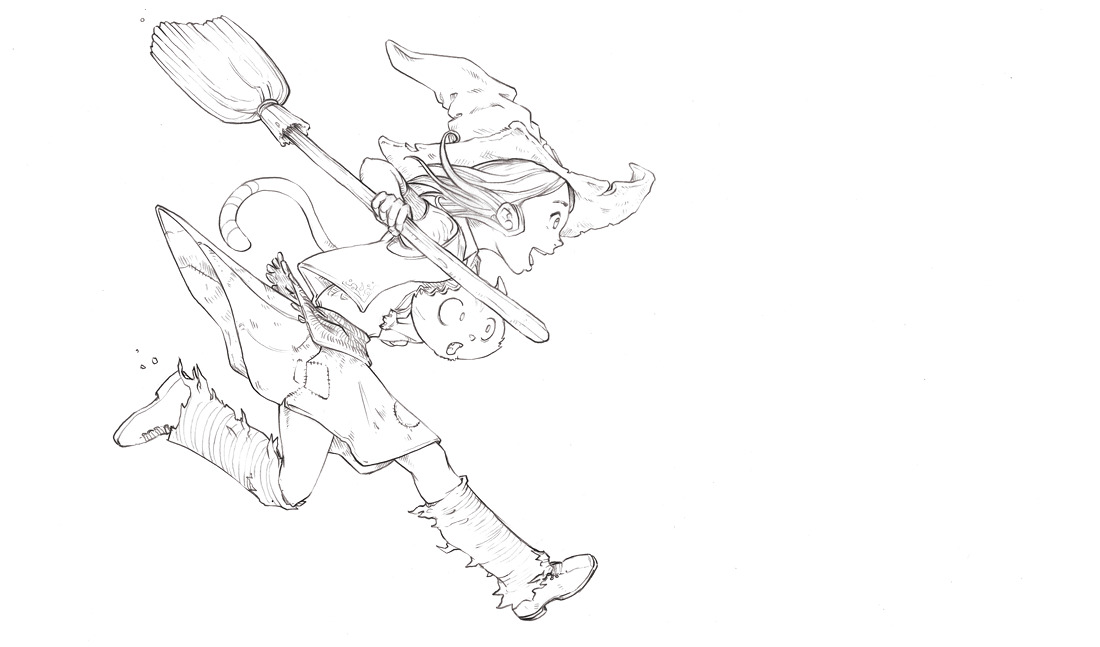
I start with a sheet of A4 random tiny sketches. I usually draw facial expression, then poses and sometime thumbnails. It's not meant to look like the good sketch you'll put into a book. It is doodling, something you'll keep for yourself; your visual notes. I do that to be in sync with my volumes, and also break the stress to draw badly later on the final sheet. On this session (illustration under), a little thumbnail had my attention. I outlined it in orange on the visual. It's certainly a classic composition, or something a bit cliché for a run and jump pose ; but I wanted to see this one with more details.
2. Guidelines
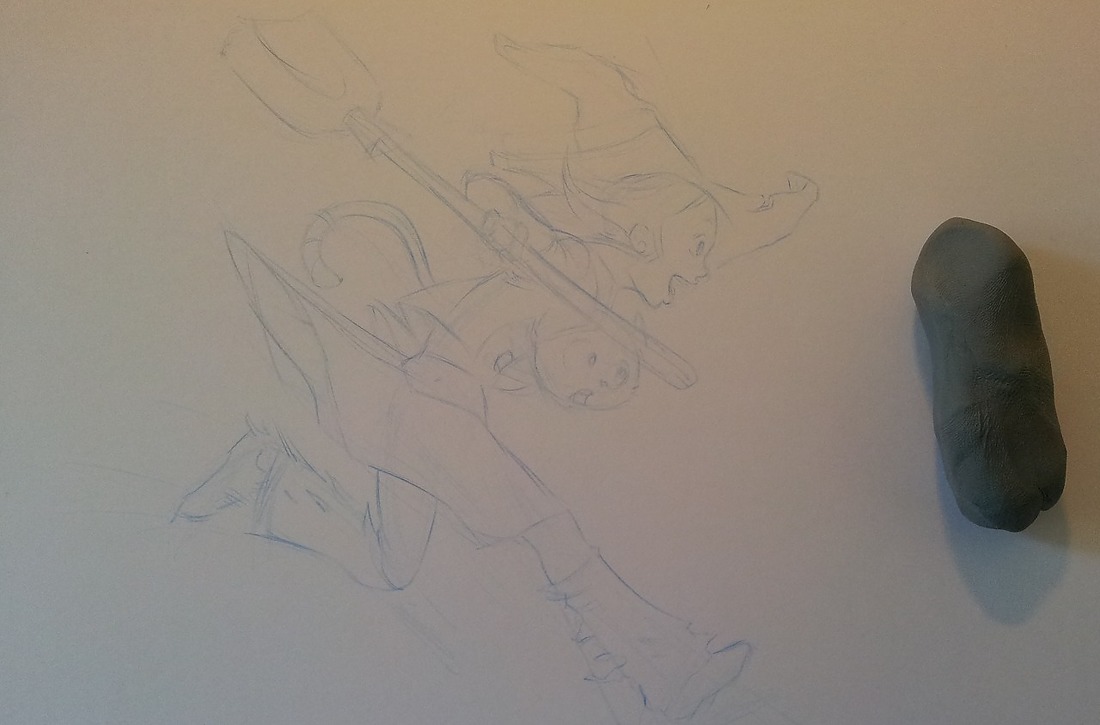
I take my reference on the side of my desk [1] and with a new sheet of paper I start drawing guidelines [2] . I keep them very light and subtle, with minimal pressure on my blue pen. I use Pentel Blue lead in 0.5mm. I tested also many other brands, and the Pentel are the one who suit more my taste and drawing style. You can see I trace large arc ; and keep the whole things undetailed. I'm looking for composition, and energy. My gesture are large, and I handle the pen also differently than usual to not draw with the wrist or finger, but involve the whole arm in the gesture.

3. Blue sketch
I keep drawing with my blue pencil, and add details. I'm doing my best to build the main volumes. I usually keep the shapes simple. I need to let room for still getting a bit of freedom on the next step. The goal is not to make a perfect blue sketch, then to just overwrite each one of lines. That would be just boring.

4. Erasing
With my kneaded eraser, I soft erase my blue sketch. Pentel blue lines are really hard to erase, so you don't risk to loose a part of the drawing definitely anyway. The purpose of this step is simple : make the sketch line easier to remove with Krita later, because they will be less dark ; and also bring comfort to my inking process. With a bright sketch, it's easier to see the rendering of your dark pencil lines.
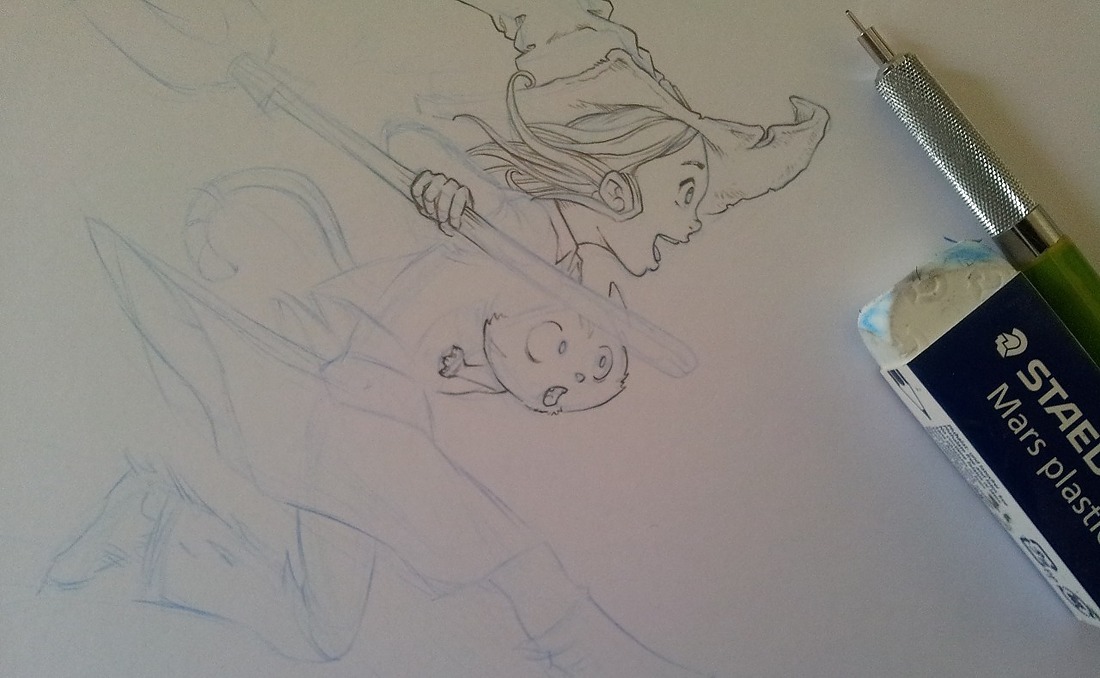
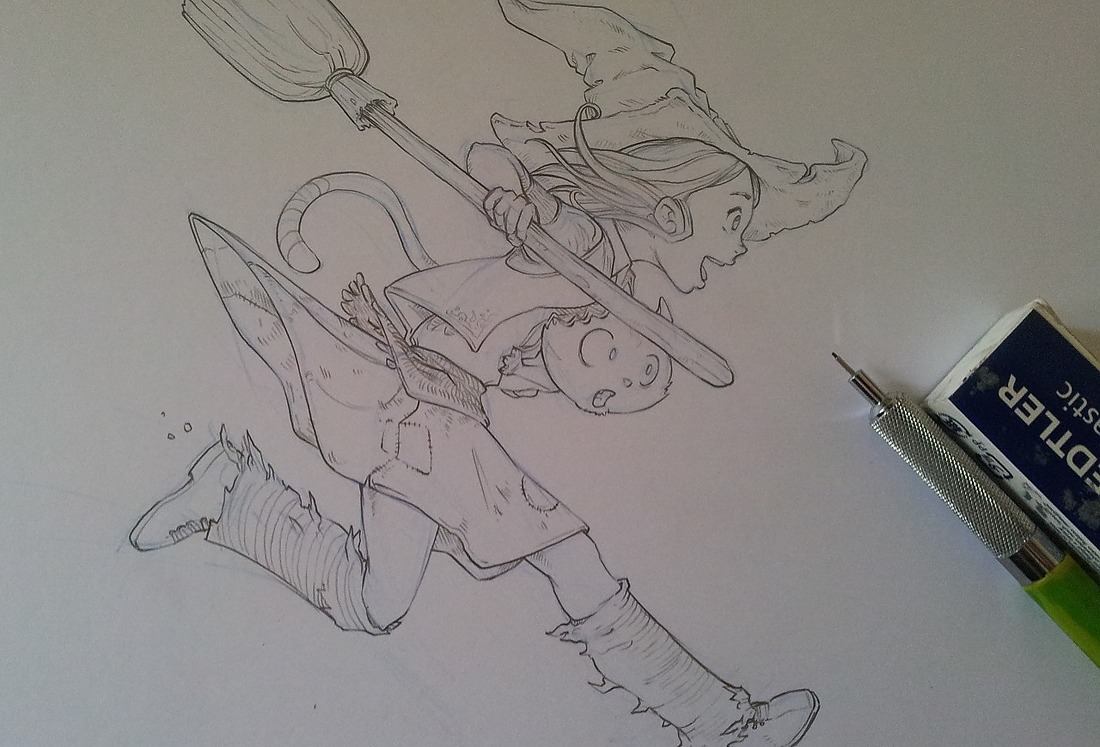
5. Inking... well, without ink
I 'ink' my drawing with Stabilo lead pencil 0.5mm B , it's soft on my Bristol paper ; and allow me dark and light grey variations. it's also very precise.
Note : my Cintiq 21UX don't allow me to draw with this same precision. That's why I'm not using it. Pixels are too big, stylus too far from the surface, and stylus nib impact this glass at 5mm over the real surface. So impracticable for my style of inking.
 'Inking' is over !
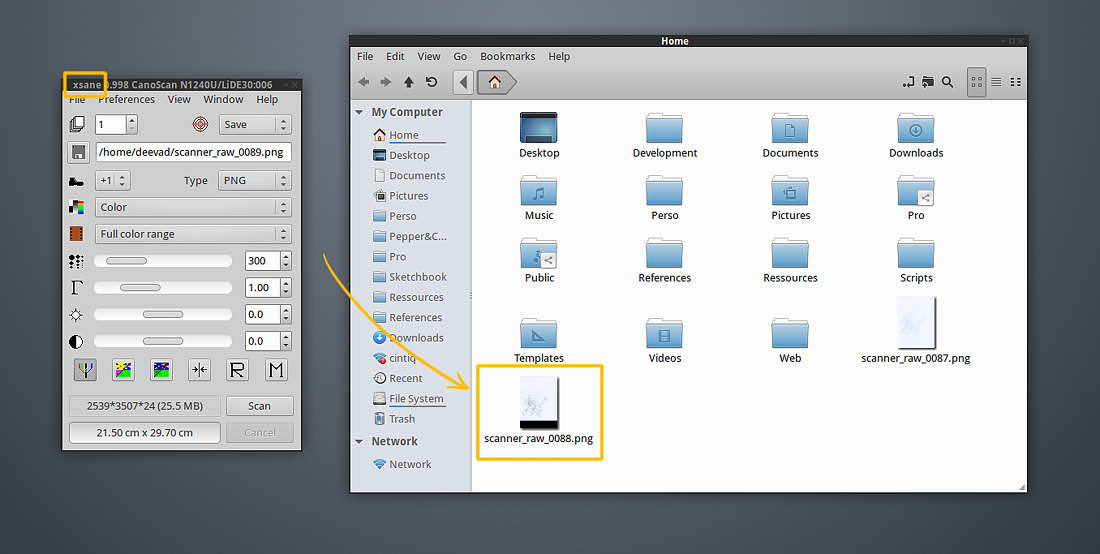
6. Scan
I scan on my Xubuntu 14.04 Linux desktop with Xsane, from the default package. You can notice on my screenshot my super compact dark windows border theme for Xfce. My file manager is Nemo. I can setup Xsane to just grab all the surface of the scanner, and save them as PNG 300dpi in color automatically on my disk.
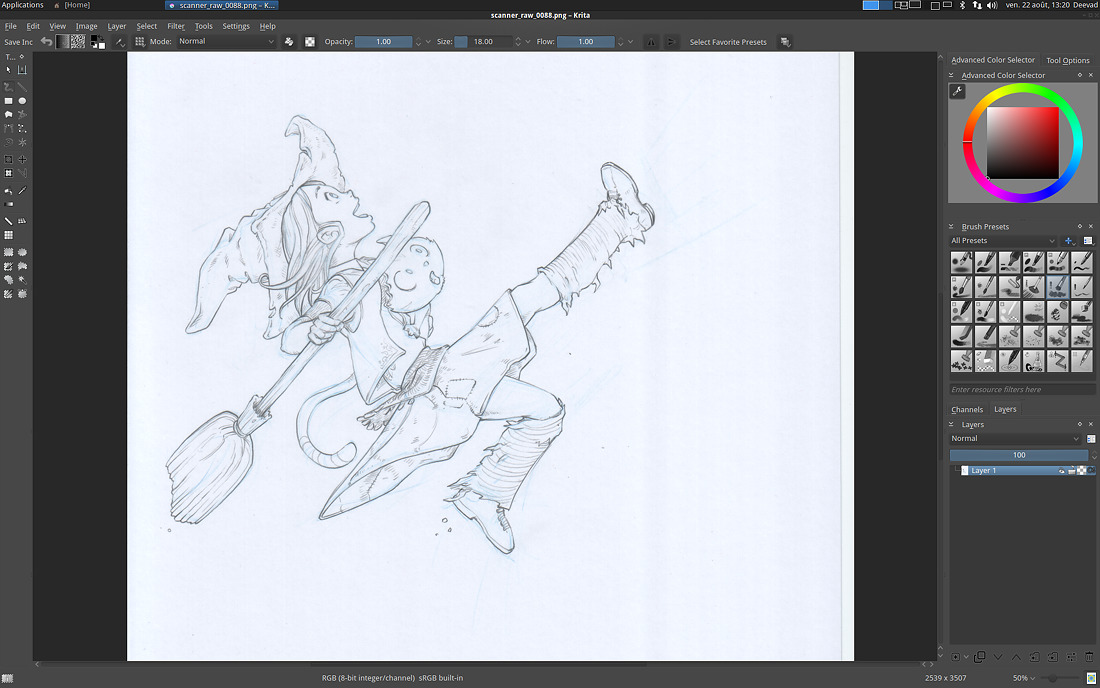
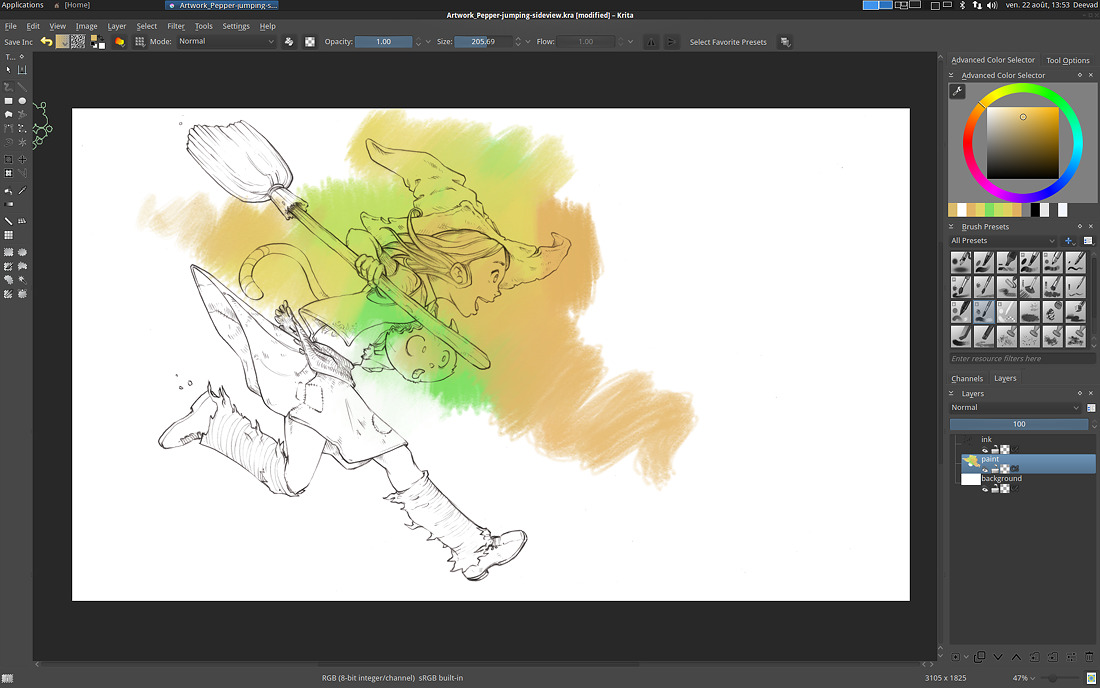
7. Krita
I open my file in Krita (version 2.8.5 from the Kubuntu update ppa). The only modifications I made on my Krita install is the usage of a dark theme and for the presets my latest brushkit. The raw scanned file is available at the end of this tutorial.
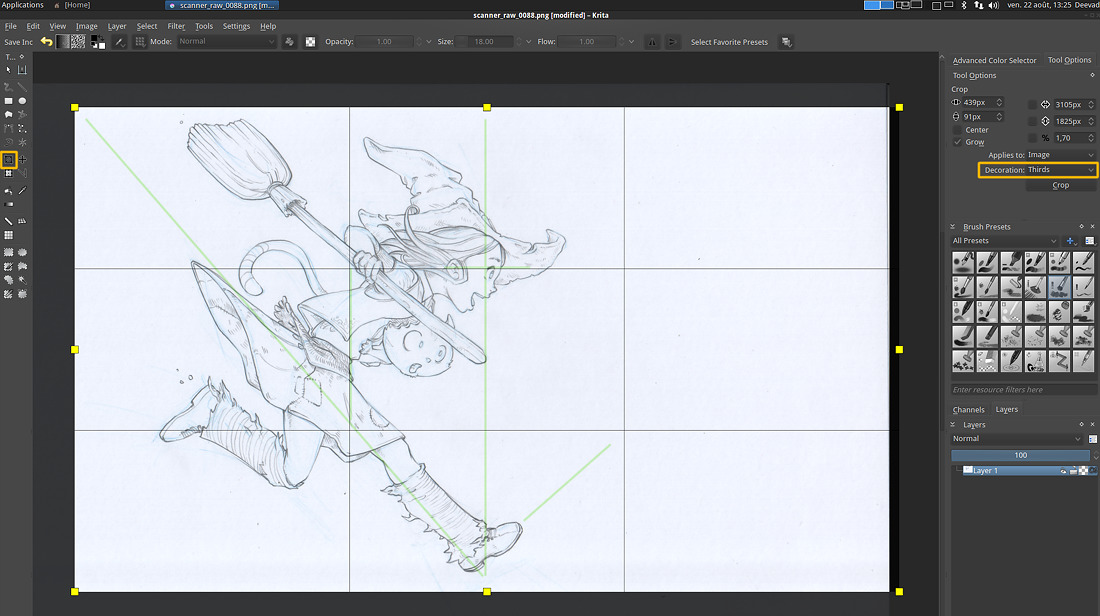
8. Cropping
I rotate my Image with Image > Rotate > Rotate image 90° to the right . Then, I select the crop tool , and in the tool options ; I activate the 'Thirds' Decoration. This lines helps me to setup a better cropping. I added over the screenshot here under green line to show you the composition lines I'm looking for.
9. Filter : Color Adjustment curves
Open Filter > Adjust > Color Adjustement curves, [1] and flatten the channel RED and GREEN [2] , [3] . Don't touch the BLUE one [4]. You should get a full Blue picture. By doing this, you'll merge the blue datas of your sketch into this ocean of blue ; and so, sort of removing them.
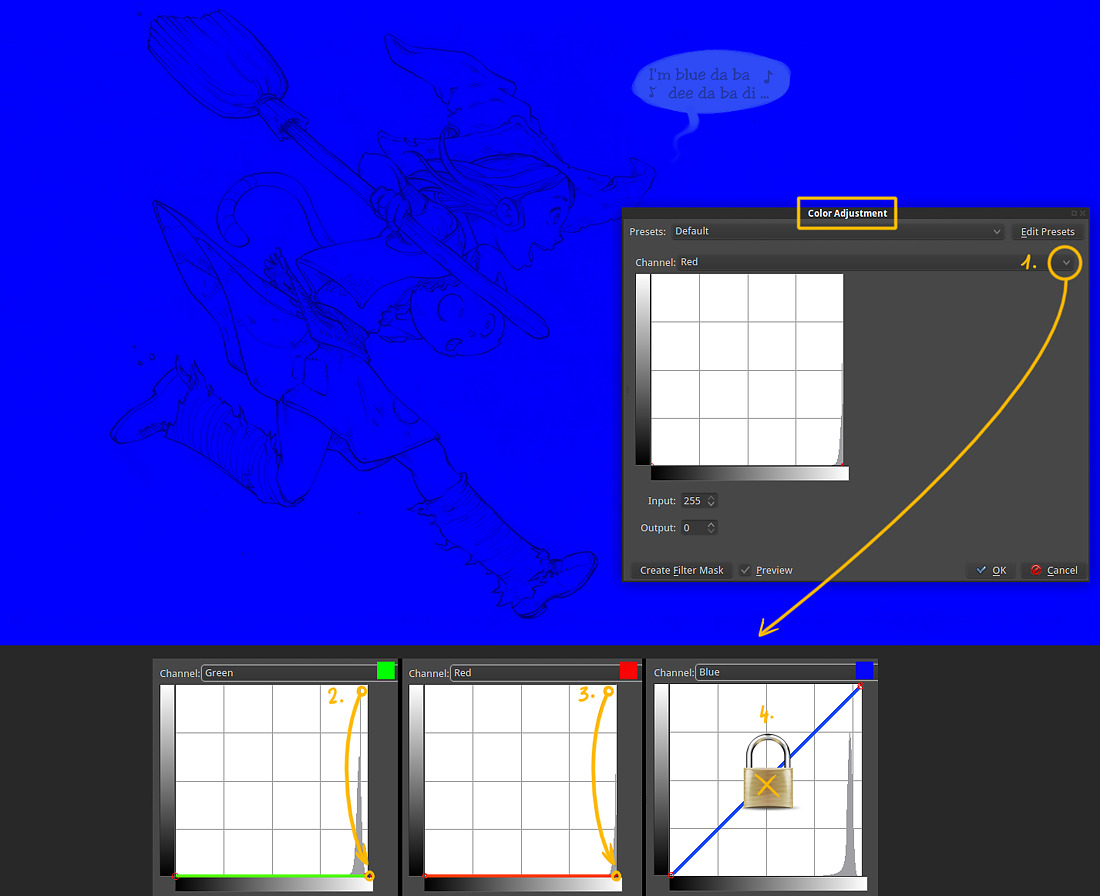
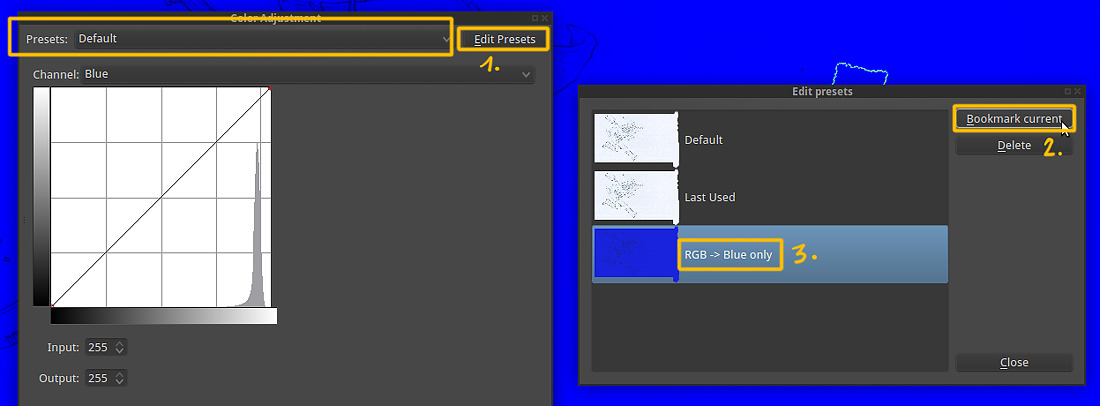
Protip : Accelerate your workflow, save a preset for your filters the next time you need to use them. It works for all the filter in Krita. Press 'Edit Presets' on the top-right corner [1]. And then 'Bookmark current' [2]. Your preset will be added to the list [3] . You can also rename the item with a right-click (eg. here : "RGB->Blue only" is my name for this preset ).
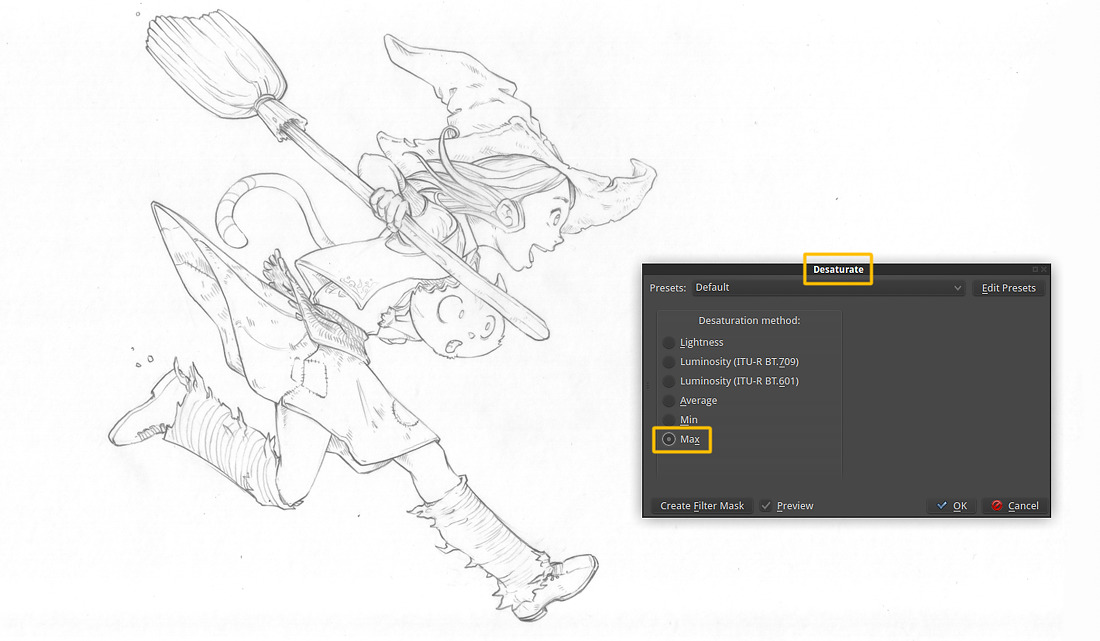
10. Desaturate Max
Now, to remove all the blue in our artwork, call the Filter > Adjust > Desaturate , and use the 'Max' option in the list.
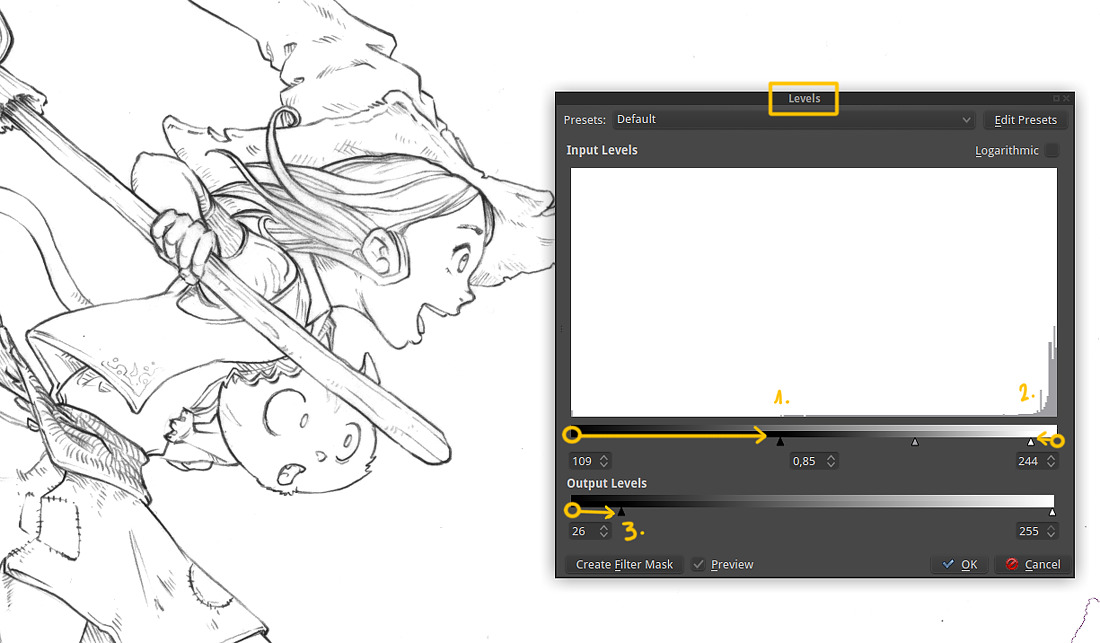
11. Tweak values with Levels
Open the levels, Filter > Adjust > Levels and move the little black triangle cursor where the histogram graph start to show datas [1] ; and clean all the white-grey noise [2]. When you scan paper, you usually get a little mountain in the histogram on the white part (right) to clean.
I also crop the black [3] because I want to avoid black pixels on my lines.
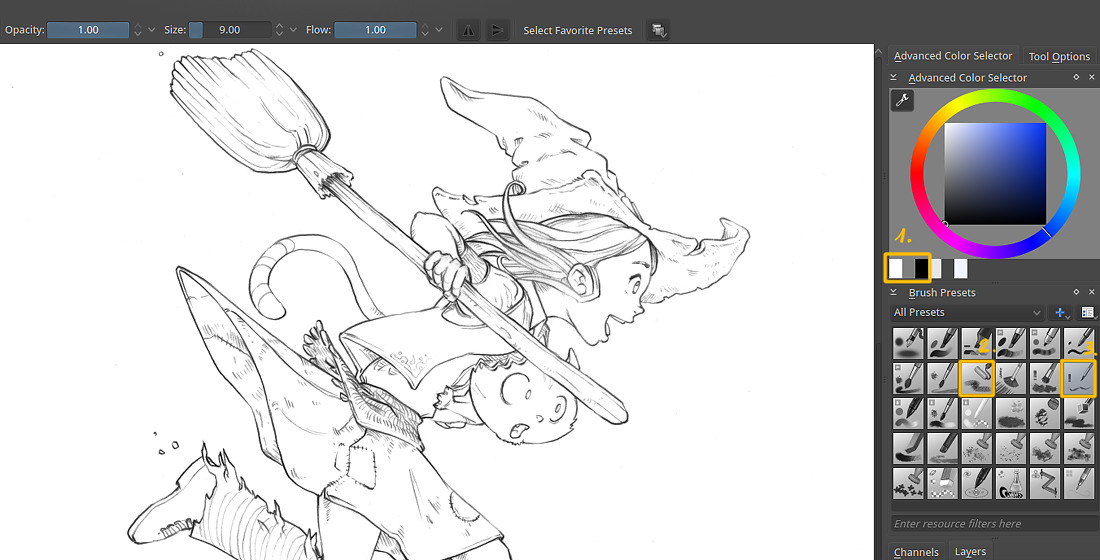
12. Manual cleaning
You have now time to just take a brush pick black or white color, and fix your artwork the digital way. I don't use black, but a 90% black one, so I use my color history in the advanced color selector [1] to retrieve the color each time. I manually clean the dust, redo the line I didn't like, or deform and transform the whole drawing. I 'm drawing often with a little rake [3] and clean with a bigger preset, like my roller-brush [2]. For this artwork, I did only a classic dust-removal work, painting with white over all the little dark grayish stain .
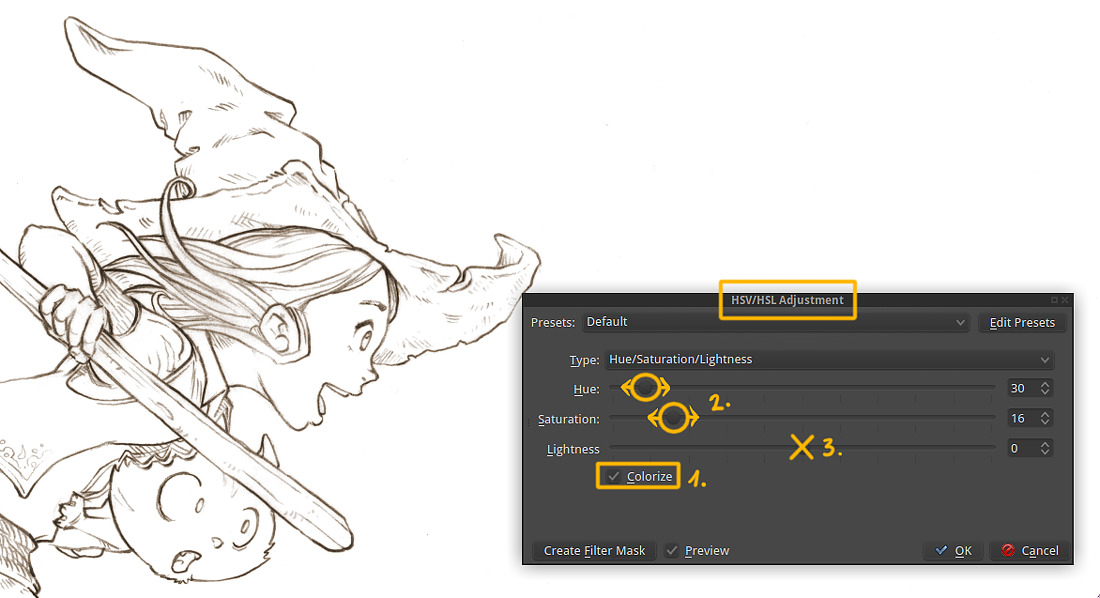
13. Line-art coloring
Open the Filter > Adjust > HSV Adjustement, and start to click 'Colorize' [1] , then you can adjust the hue and the saturation [2]. I don't recommend to tweak the Lightness [3]. My taste here is for a dark Burnt Sienna . Save a Presets [read : chapter 9] if you need to find the exact same color setting next time.
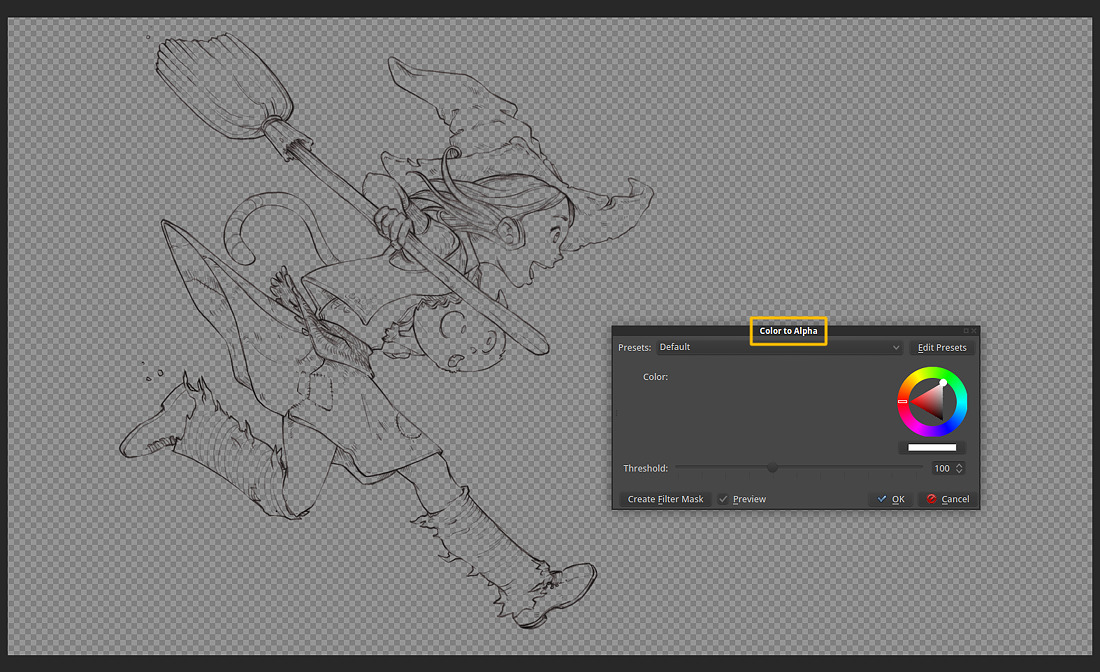
14. Remove the white
In order to keep just our lines, we need to remove the white background. But our image is flat. A good filter to handle this is the Filter > Colors > Color to Alpha.
The default setting of this filter is to remove pure white, and the default threshold is perfect for this task.
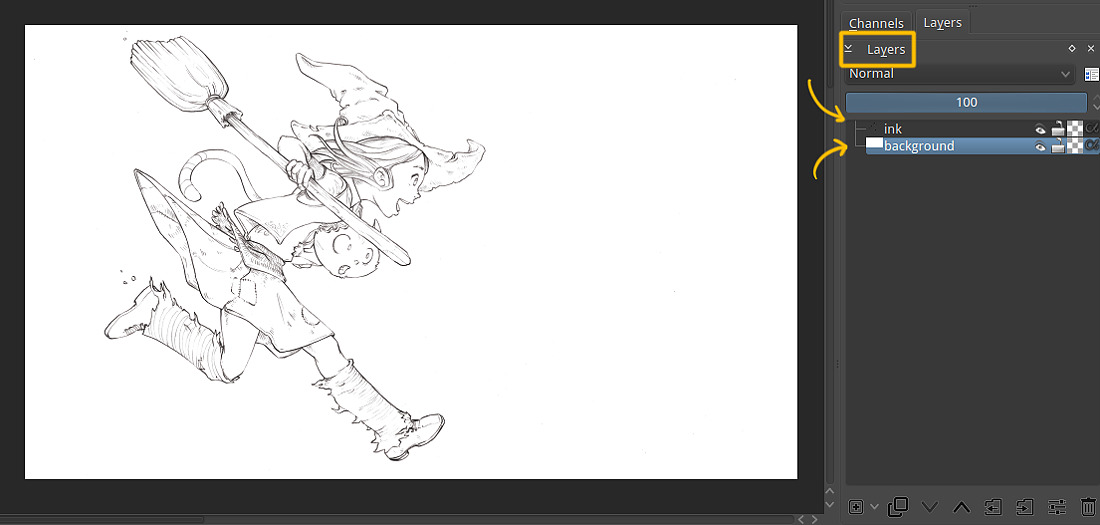
15. Manage layers
We deleted the white background in our drawing and now we will create it again. But this time it will be on a separate layer under. For doing this, create a new layer, and put it just under our line-art. Fill it with White ( select white color, then go to Edit > Fill with foreground color ). Then rename the layers for making the project cleaner.
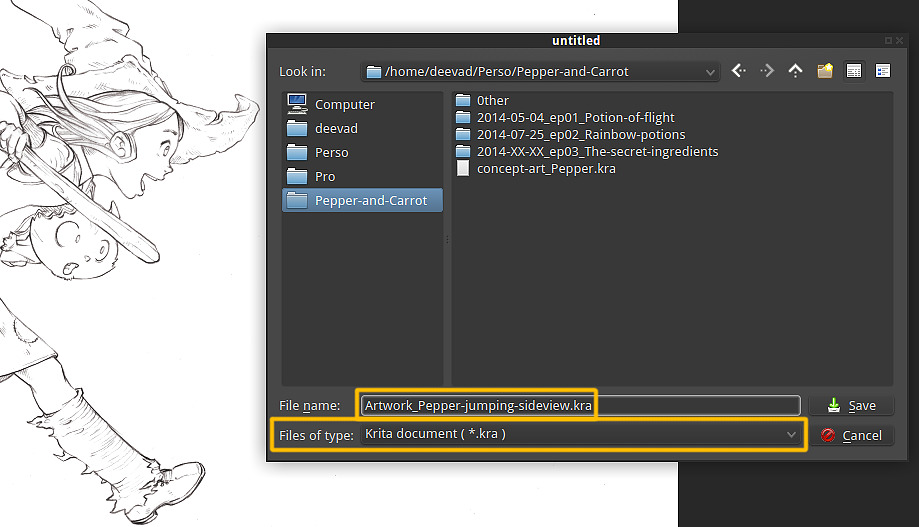
16. Save it
Just a little reminder : Save your artwork as *.kra .
17. Final line-art :
This is a low resolution of the cleaned line-art. If you want to get a look at the full resolution, download it (link at the end of the tutorial).
Summary :
This method to remove blue-lines might look complicated and long because this tutorial is detailed with many notes and photos. But once you master it, it's a 3 min job. And you can repeat it easily across a pack of ten page of web-comics in less than 30min. The main infos to remember:
- Color adjustement curves and make Blue by flatting Red and Green channels ( 2 click with a preset )
- Desaturate Max (2 click with or without a preset)
Other part are just too easy in a workflow and make sens by themself (crop, contrast, remove alpha). From all the method I read (often about Gimp or Photoshop ) this is the fastest one for me, with the best results and centered around a single software, Krita. That's why I use it in production.
Conclusion :
Now our file is ready to receive a paint layer between our Bakground layer and our Lines.
Also, I have a method to color my artworks, but this will be for a next tutorial ! (coming after Pepper&Carrot ep3)
Source files :
- Raw scanner (PNG, 300dpi, Xsane)
- End .kra files ready to color (Krita 2.8.5, .kra)
Download here : http://sta.sh/019n962job53e (11MB)
Links :
I recommend also you to read the exellent article : Removing blue lines from a drawing: The rise of the colour channels. with Gimp and Krita by Wolthera van Hövell tot Westerflier.
