


Comics inking and coloring with Gimp 2.6
1) Scan the pencil drawing :
First step is the scanner acquisition with Xsane of my drawing (HB pencil on A4 paper ). I scan it in Gray level at 300dpi. To produce a beautifull result , I play with the level to clean white.
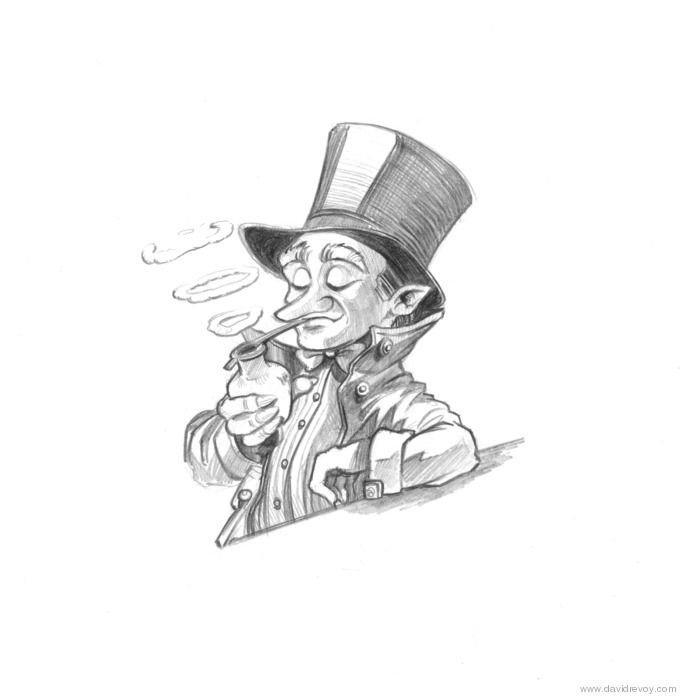 the original pencil drawing
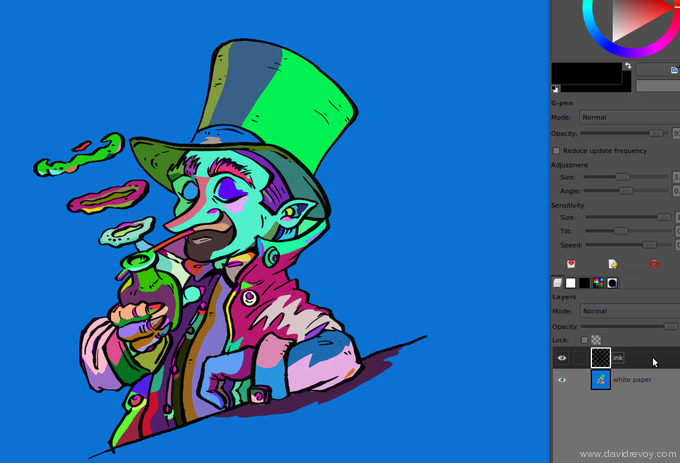
2) Inking :
I start to convert my pencil artwork in a light blue range of colors ; I use the tool colorize ( Color > Colorize ).
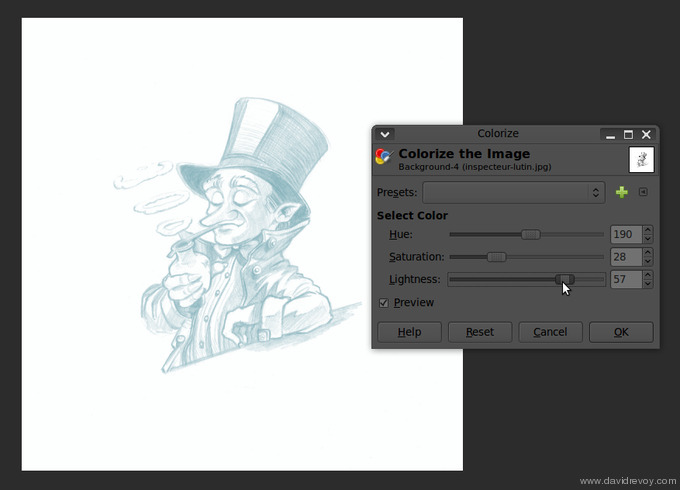 the colorize tool in action
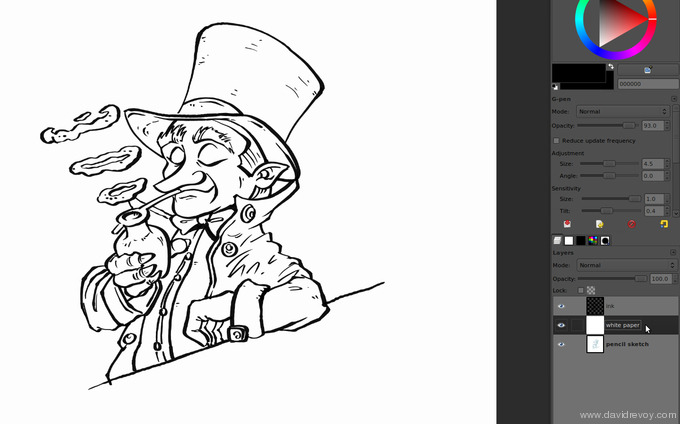
With the G-Pen tool of Gimp-painter I start to ink my drawing, on a separate empty layer. The screenshot above show the setting I use with G-Pen.
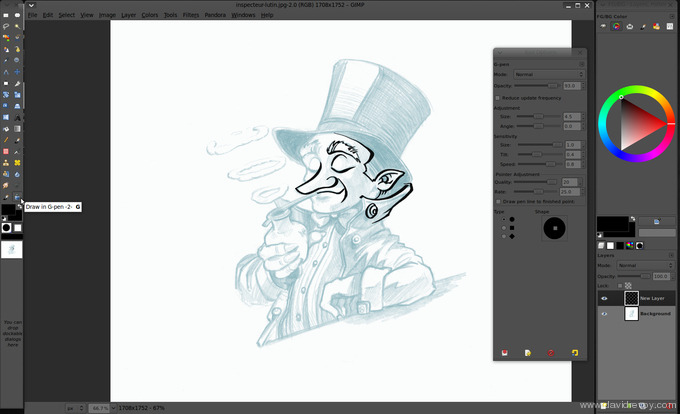 starting the inking process
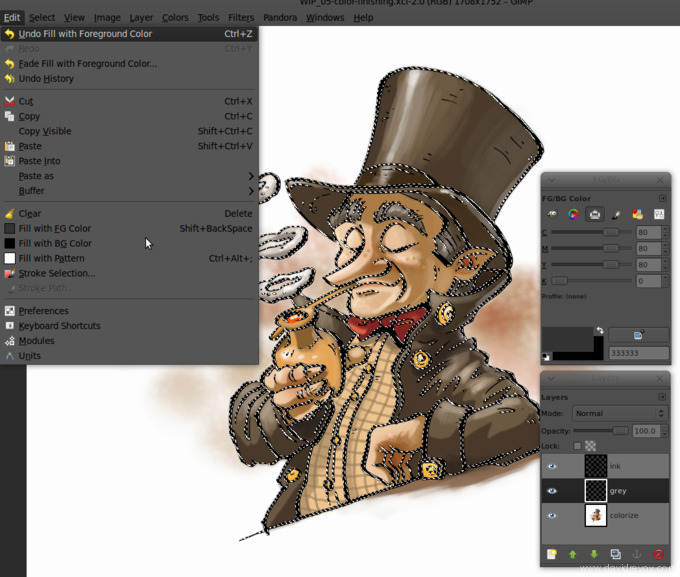
At the end, I add a white layer under my line-art to finish my inking. When it's finish , I save my work, and I save in another file a copy of the final Line-art layer ; I will need it later.
 finishing the inking with a white layer under
3) Multi-Fill
This is probably the main section of this tutorial. I add a new layer under my line art, and I start with a thinner G-pen in red to draw the limit of each different color zone I want. I flatten the layer when it's finish.
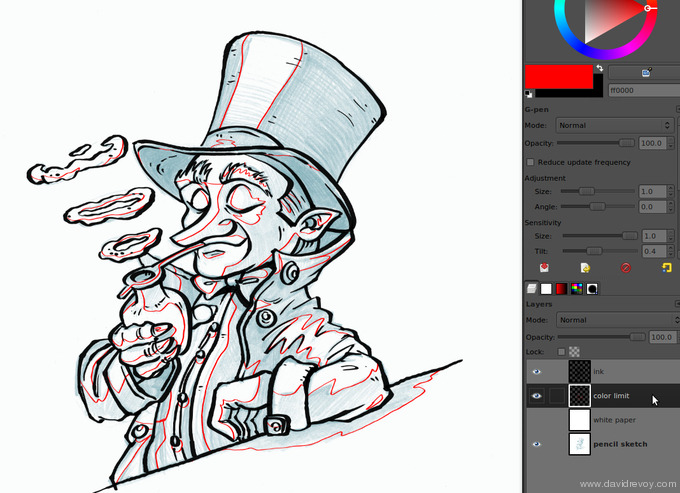 preparing the zone for the cell-shading
I launch the script 'Multi-Fill' with the same setting as in the screenshot above and I let the script detect each closed zone, and fill with a random color.
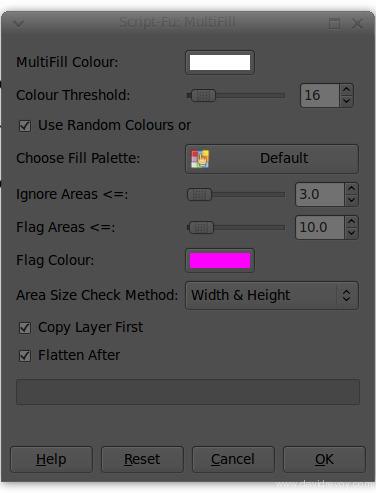 the flatting-tools script in action
When it's finish ; delete the layer above with Line-art + red limits ; and load ( load as new layer ) your old copy of final Line-art ( the one without red lines ).
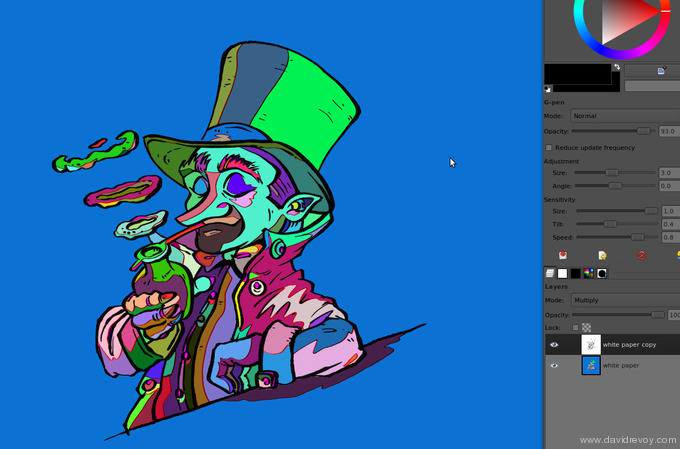 the result of the flatting tools
As you see on the animation above; the advantage of this script is in the clean result of the colorisation : each zone frontier are right in the middle of the thickness of your black lines.
 importing the line-art over the result
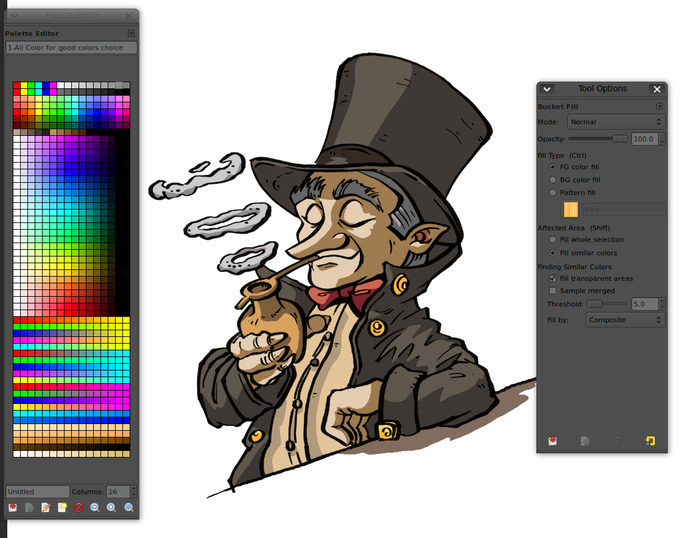
4) Colors
With the Fill bucket tool ( with the option 'fill similar color' and a low 'treshold' ) , it's easy now and fast to replace each automatic psychadelic colors of the Multifill script. Open a large color palette to make this process easier. For most of the fast cartoons with a cell-shading rendering ; this step can be the final.
 coloring by replacing the colors
If you want to add a bit more of life, you can brush with a rounded basic brush over the colors layer with some brighter strokes and a low opacity. You can play with the balance of colors to warm up the overall too.
 adding life with a rounded brush
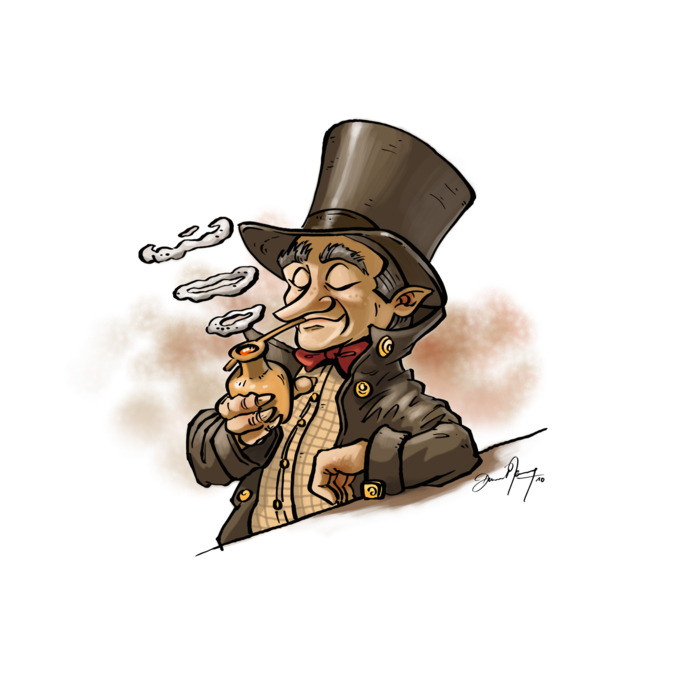
the final RGB colorisation
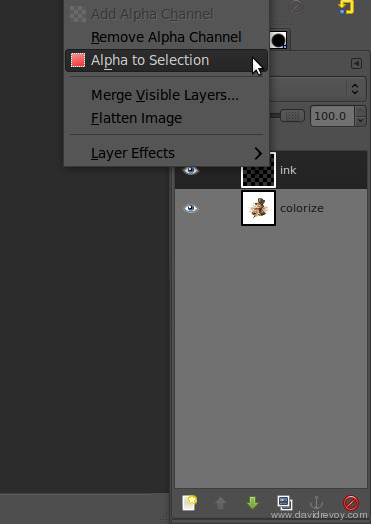
5) Export for print
For exporting in CMYK I still use my license of Photoshop CS2 ( with Wine ) cause I still don't know how to do it with the security of a corect result with only FLOSS. Be sure when I will know it, I will be the first to use it. I want here to have all the color using the CMY cartbridge colors only and the line-art using pure Black color ink. Also, I want to prepare under the line-art a dark grey to make the black look deeper when it will be printed.
 selecting the line-art layer
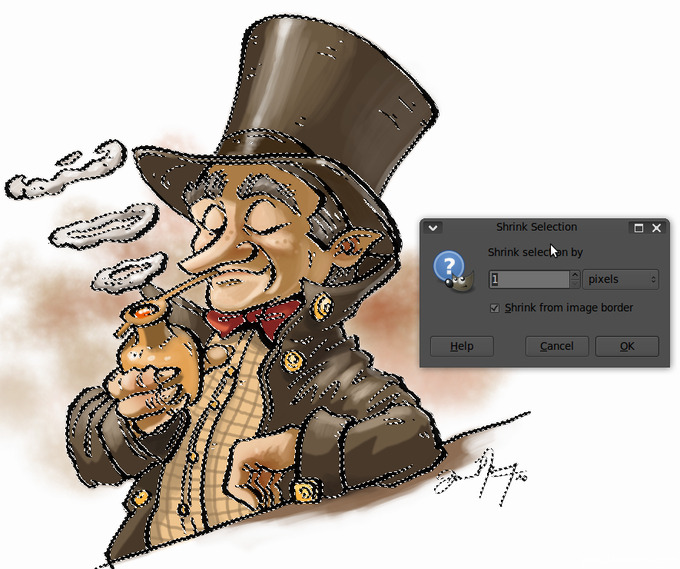 shrink the selection of 1 pixel
 Fill the selection with grey on a new layer
I prepare the grey layer in Gimp ; I use the 'Alpha to selection' on my line-art layer combined with a 'Shrink selection' of 1 pixel. When it's done, I fill the new selection with a dark grey. To give the file to Photoshop, I save in PSD. On Photoshop, I convert my file using the layer group properties to restrict the channel; on the black ink , I use only 'K' , and on the color and the grey channel I use only 'CMY'. I change the color on the layer of line-art to use only Black 100% and on the grey I setup the grey of my publisher : C=80% M=70% Y=70%. I finish with saving to the TIFF file format , with the CMYK ICC profile asked by my publisher too, here a 'Europe ISO Coted Fogra27'. For saving disk space, I allow a LZW compression. That's all !
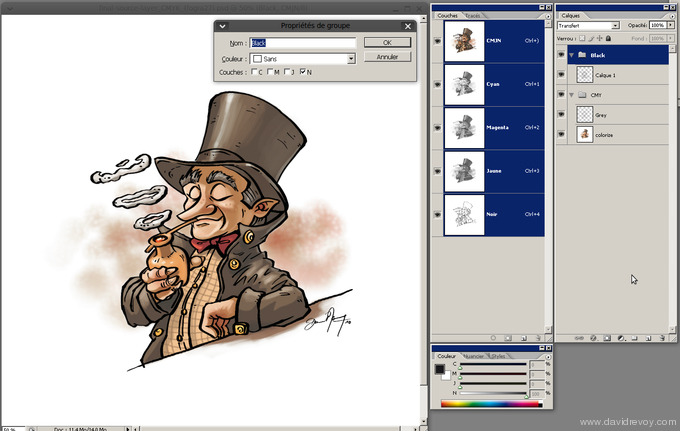 Result of the CMYK conversion with Photoshop CS2
Download :
Here is an archive file with the final RVB file in xcf and the CMYK in TIFF. gimp-painter-color_source-file.tar.bz2
Sources :
- Flatting Tools : http://gimp-registry.fargonauten.de/node/14051
- (FR) "Colorisation de BD Du traditionnel au numérique" (FR) de Stéphane Baril, Naïts ( http://www.editions-eyrolles.com/Livre/9782212115086/colorisation-de-bd )
- Almost same technics with Photoshop: http://www.questionablecontent.net/tutorial.php
